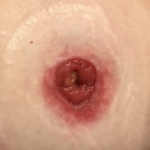
Help! What Are All the Ostomy Supplies?
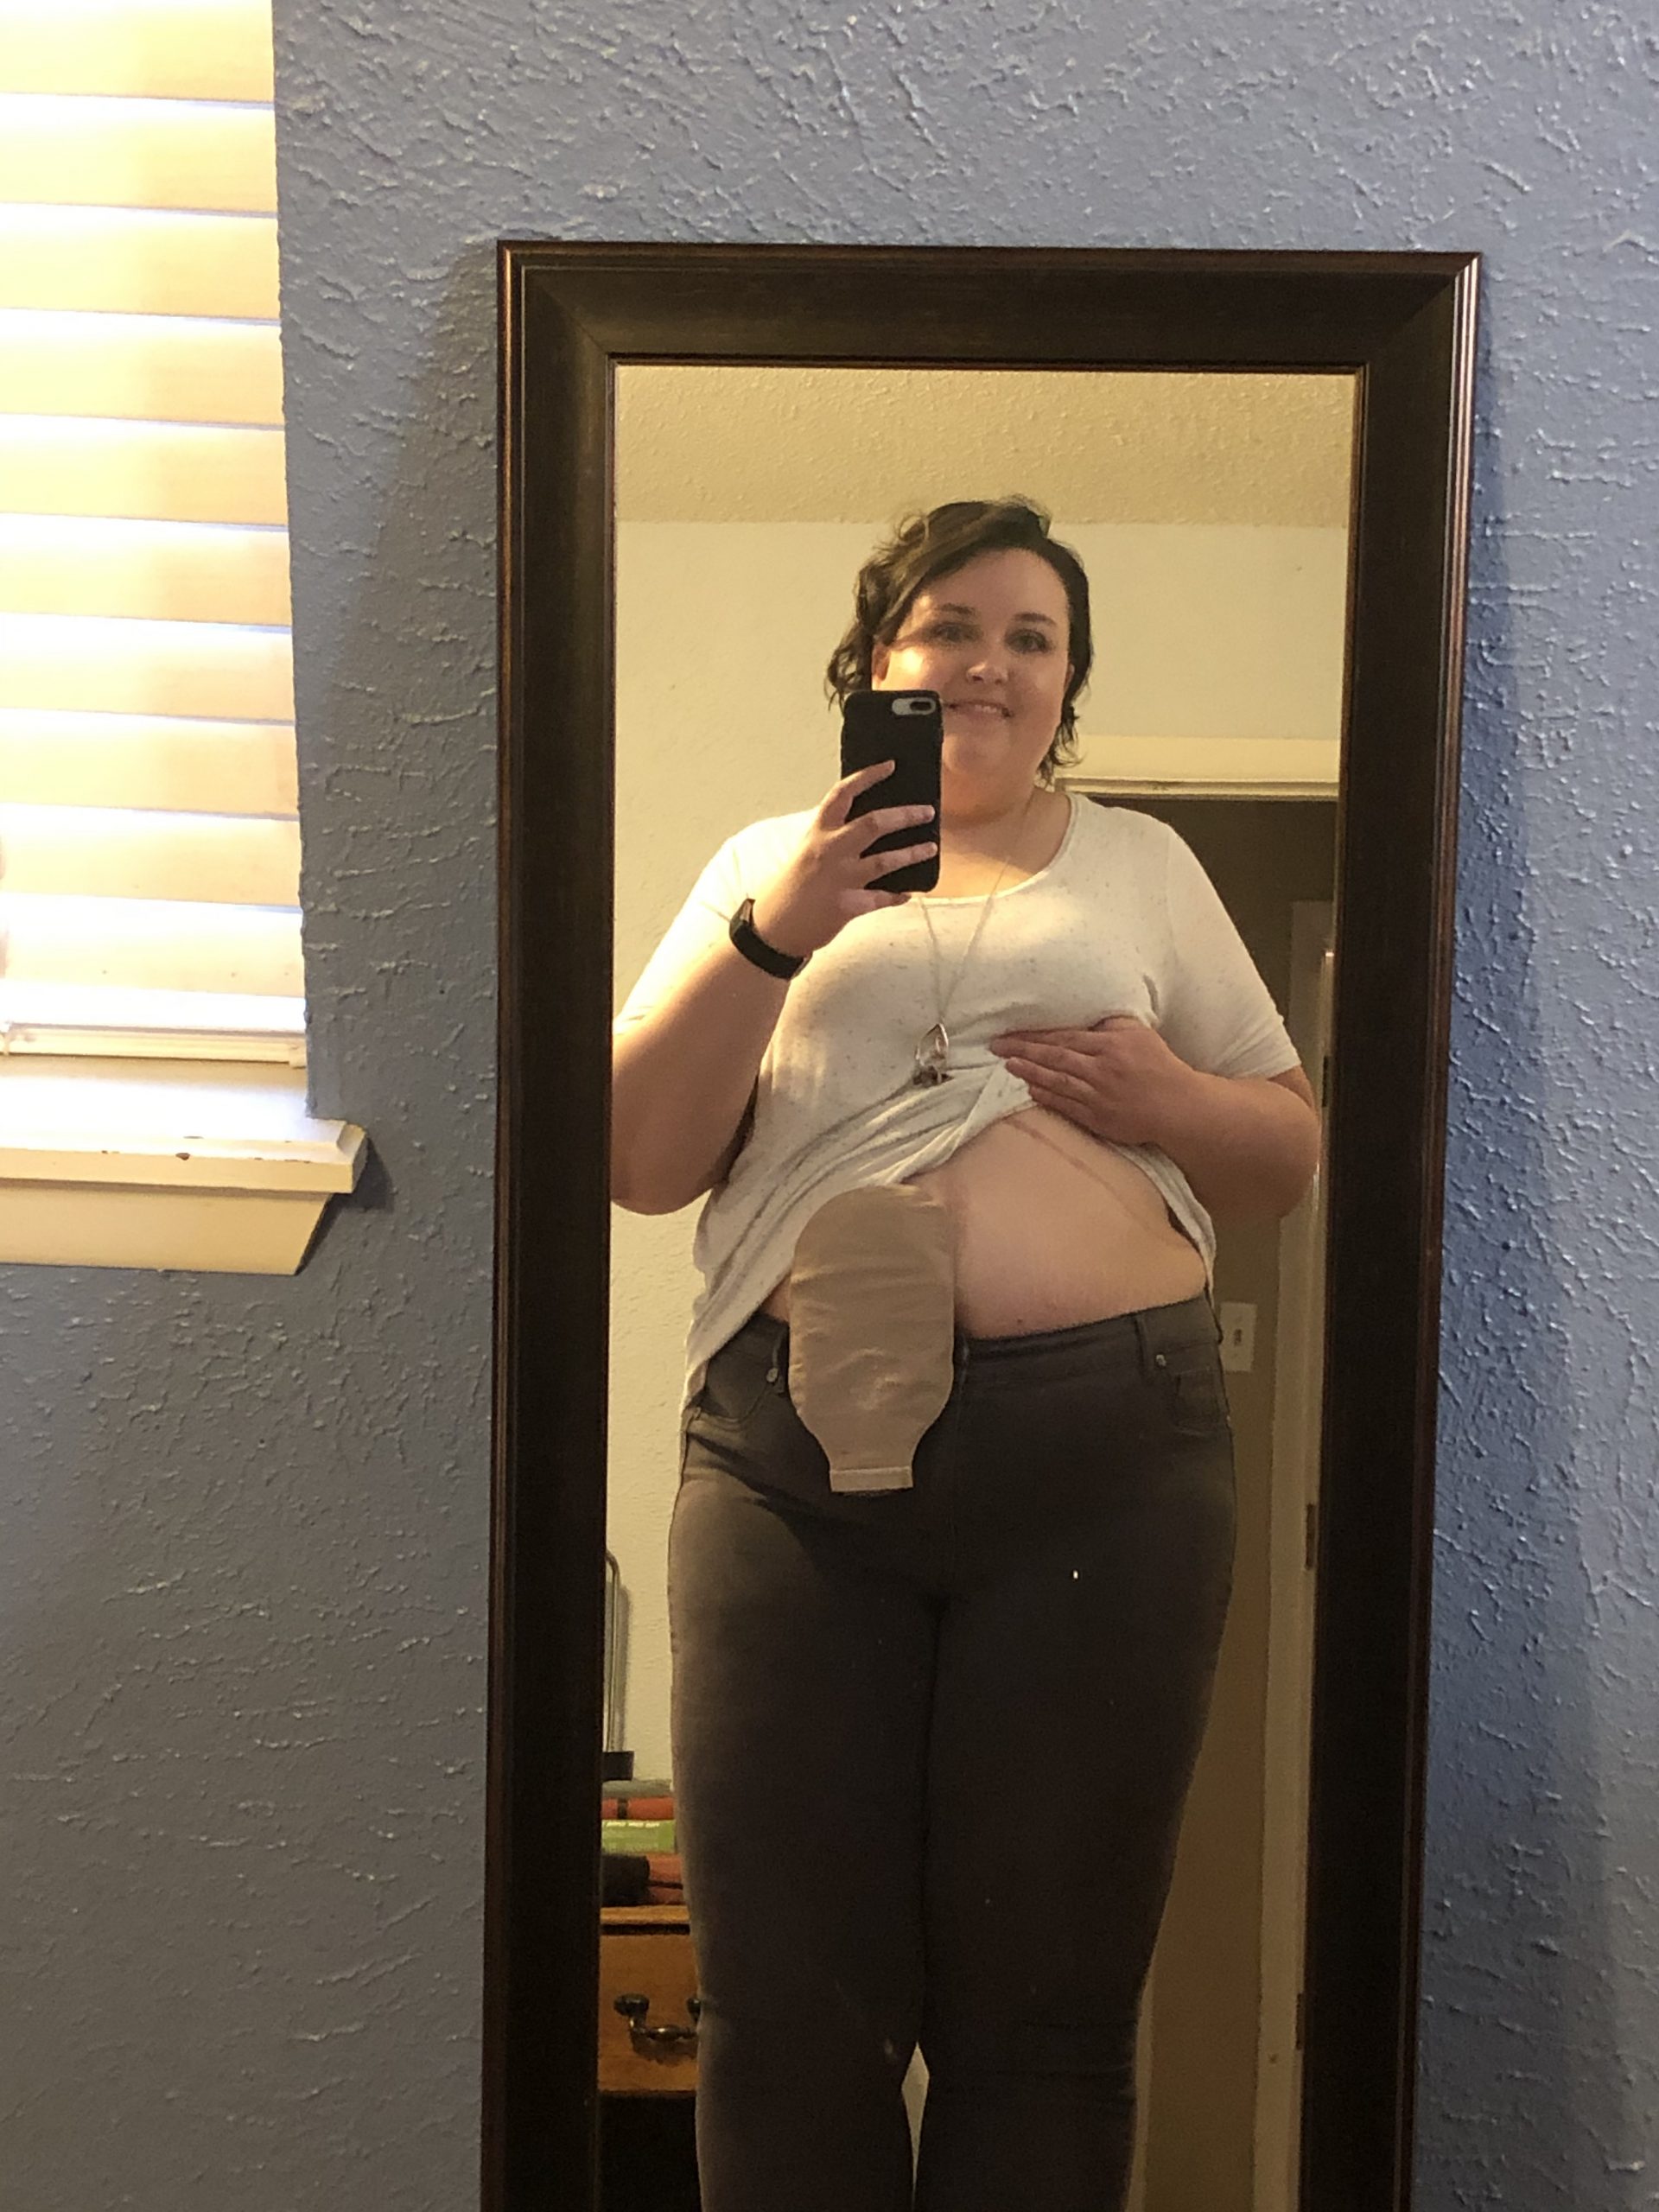
Welcome to Life as a Cancer Survivor. In today’s video, I’m gonna talk all about the different ostomy accessories, supplies, the companies, and how you use all of it. Yes, there are so many different accessories and stuff that it takes up an entire video. In case you’re new here, welcome! My name is Jelena and I was diagnosed with Stage 3 Rectal Cancer in May of 2016. As part of my treatment, I had surgery to remove 12 inches of my colon/rectum and while that resected site healed I had an ileostomy for 7 months. Now on to the ostomy supplies.
First, let me talk bags. There are three major ostomy companies, Convatec, Hollister, and Coloplast. I was sent home from the hospital with supplies from Convatec. Once I got home I called Hollister and requested some samples of some of their supplies based on a recommendation from my wound care nurse. In this day and age, most people don’t like making phone calls, but the reps were super nice and very helpful, especially if you’re new to the ostomy thing and unsure of what kind of stuff that you actually need.
Then after a few weeks of trying out the Hollister bags, I decided to call Coloplast to get some samples from them. They asked me when I called what kind of bags I was currently using, how I liked them, and if there were any challenges that I was having, and then they sent me a box of samples. They quickly became my favorite bags.
First, I didn’t have to fight with the clicking anymore. The Coloplast bags I got, they have a sticker a paper that you peel off and you just stick it right to the barrier. The part where it sticks to the barrier, it lifts up a little bit so you can squeeze that or pinch it together with the bag and make sure there’s a good seal all the way around. I never once had it fail on me.
The reason number two is that the bag itself it’s made out of more of a 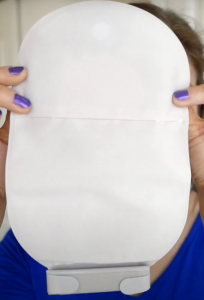 waterproof material so when you get out of the shower it takes maybe a minute or so to dry it completely off with a hairdryer. The third reason that I loved these is that the part where you empty it, it folds completely up into the bag. So let me demonstrate here let me open this up for you so you can see how it looks when you’re going to empty the bag, so here we go. So it empties this part it opens so that your waste drains out then after you’re done you know, wipe it off then you fold it up, you’ve got the tabs on the side, and then this goes in here and it’s completely hidden no germs on your clothes.
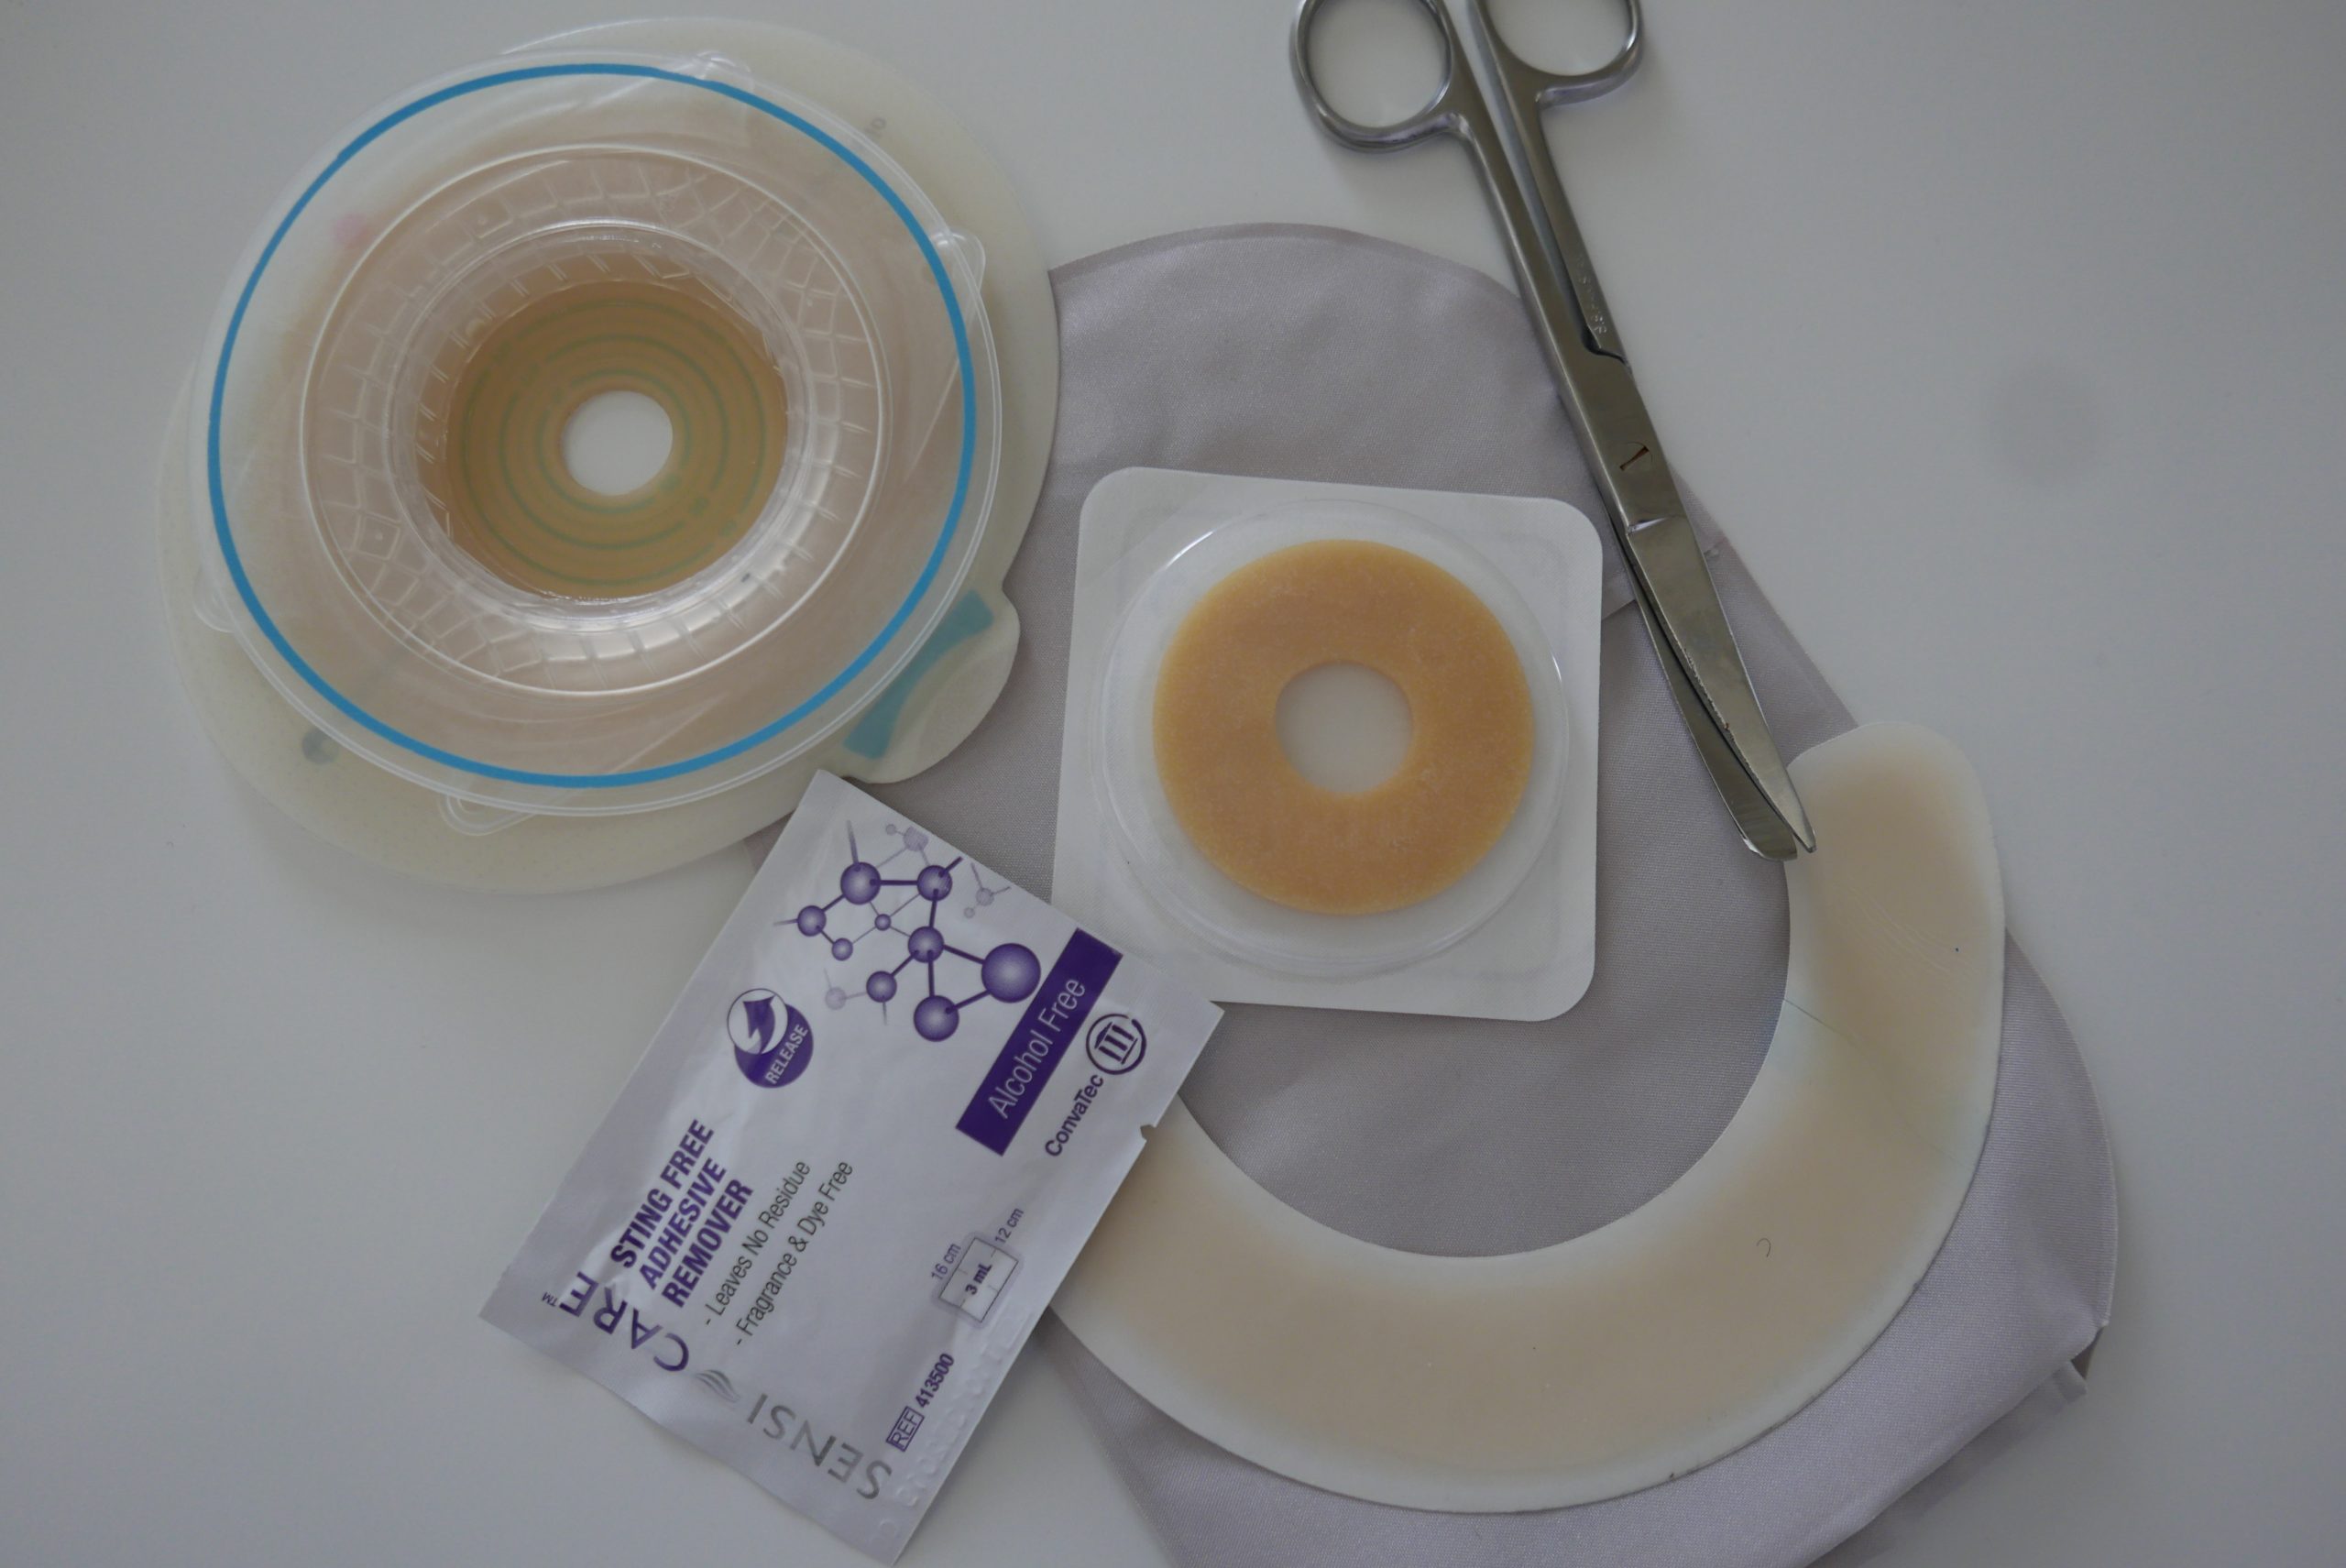
When I was discharged from the hospital I was sent home with a catalog, very thick catalog of all the different ostomy supplies to choose from. It was so overwhelming. So let me go over what a lot of those different options are. First is the 2-piece system. It’s the system that I used and it seems to be the most common one. So all it means is that the bag and the barrier are two separate pieces so theoretically you could wear the barrier for multiple bags you can take the bag off and replace it with a fresh one.
Different companies have different ways for you to make the opening on the barrier the correct size for your stoma. There are multiple barriers where this part here it’s more of like a clay-ish material and you roll it back and pinch it down into whatever shape that you need for your stoma. Then there are cut to fit barriers where you cut the hole yourself. They already have a little bit of a hole and then you just cut it larger to whatever size your stoma is. They give you like a stiff paper kind of guide that has a bunch of circles on it and you can lay it over your stoma to figure out the size and that’ll help you guide you on how big of a circle that you need to or a hole that you need to cut on the barrier. I also got lots of scissors from all the ostomy companies to use to cut the barriers. They’re more rounded so it makes it easier to cut in a circular shape and they’re a little shorter too so you don’t have a whole lot of extra blade to deal with while you’re cutting.
Then are pre-cut barriers that you can get. After a month or so after surgery when your stoma has kind of finally settled in size, if the opening is perfectly round then the pre-cut is the way to go. Mine was never perfectly round so even if I bought ones that were pre-cut I would still have to modify it so I figured why bother getting pre-cut if I’m gonna have to cut it anyway. I would still not recommend ordering more than about a month or so at a time of the pre-cut barriers for a while, while your stoma is still making some minor changes and getting settled in.
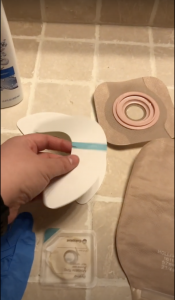
I also mentioned in my last video in the first week with my ileostomy that I had a lot of troubles trying to click the bag onto the barrier because my muscles were so sore and weak I couldn’t flex them to give a stiff surface to push that bag down onto the barrier. My wound care nurse recommended trying an accordion barrier that Convatec carries. As you can see from this picture the part of the barrier that the bag clicks onto can be pulled up so you can get your hand and fingers under it so you can pinch the two together to get it to click easily. This made getting the bag to click onto the barrier way easier but since there was that accordion bit even though it did flatten back down some it was still pretty bulky and it was more expensive than the traditional barriers so I only used a few of them at the beginning.
Next is the one-piece system. As you can probably guess the one-piece system is where the barrier and the bag are one piece, they don’t come apart. They’re good for you if you change the bag in the barrier at the same time and you don’t ever adjust the positioning of your bag. By that I mean, the ones that click together you can rotate the bag in the position that it is in on you so you can have it like down when you’re emptying it over to the side a little or if you’re wearing a special belt you can move it completely sideways but with the one-piece whatever position you put it on that’s where it’s stuck.
Now onto the accessories. First up are powders. You can use stoma  powder on the skin around your stoma to make sure that it’s perfectly dry before applying any kind of like barrier spray or wipe or even just putting the barrier on. Having dry skin before you get started is really important for your skin health and it also helps the barrier to stick much better. You apply the powder using a puff method so that kind of a cloud of the powder puffs out and gives more of an even coverage rather than having blobs all over.
Next up are barrier wipes and sprays. These are the first layer of protection that you can put down on your skin. Using a  skin barrier helps protect your skin not only from the output but also from the adhesive from barriers. I started to develop a bit of an allergy to the adhesive, so using the skin barrier wipes would help keep my skin from getting as irritated from having that barrier down all the time. It also helps prevent the build-up of adhesive around your stoma and promotes skin health around the stoma. They come either in individually wrapped packages kind of like a moist towelette or in a spray. I used the wipe version and let’s say my stoma is up here on my chest I would start around the stoma and then I would wipe all the skin around anywhere where the barrier was going to be touching so everything underneath there I would use the wipe on.
Next up, barrier rings. These are good to help prevent leaks immediately around the stoma and protect the skin right around it. They’re also good to fill in uneven skin contours so that you have a flat surface to place the barrier on your body. So you can place these either directly on your skin or you can place them on your barrier. They’re pretty stiff when you first take them out of the package so to warm them up and make them softer you’ll want to just kind of like knead it in between your fingers and then you can stretch it, you can roll it, you can even use your scissors to cut it into multiple pieces. I would cut mine in two and I would put it on my skin directly. I would do the bottom half and the top half because of the uneven shape of my stoma it was just easier to do half at a time instead of the entire thing. An alternative to the barrier rings is barrier paste. It has the same purpose as the barrier rings it just comes in a paste or like a strip form which looks kind of like a piece of licorice. The paste, it comes in a tube so you just squeeze out however much you need. These can be better than using the ring if you just have small problem spots then you don’t have to use the entire ring you can just tear off a little bit of that licorice looking piece of paste or just squirt it out of the tube.
Another helpful accessory are barrier strips. These you put on the barrier,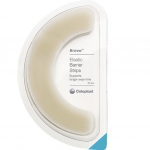 if the edge starts peeling up a little early before you’re ready to change it you can put these strips on and they’ve got the sticker on the back so they just peel off and you put these on to prevent the peeling. You could also use these if you’re doing extra-sweaty activities to help keep the barrier from peeling off. Another useful accessory are adhesive remover wipes. Sure, you could just peel the barrier off but the adhesive remover wipes make it a much gentler process and makes sure that you’re not peeling off skin with the barrier and you’re being more gentle on the skin. Since you’re
 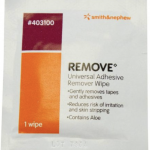 gonna be wearing barriers on the exact same place for extended periods of time you want to be as gentle as you can to that skin around where the barriers are gonna be. So using the adhesive remover wipes you just have to peel the barrier back a little bit from your skin and then use the wipe right where the skin is meeting and just keep peeling it down until you get the whole thing off. Then after you’ve removed the barrier make sure that you wash all of that adhesive remover really well off of your skin before you get started with placing a new barrier on.
Next up is lubricating deodorant. This usually comes in a bottle and you put it in your bag either when you’re putting a new bag on or you can put it into your bag after every time that you empty it. This two-in-one liquid neutralizes the odors that are in your bag and it also makes it slippery so that your waste slides out of the bag much more easily. I used it for a while at the beginning, but then I realized that I had an ileostomy and everything was coming out pretty liquidy anyway so I didn’t really need the lubricating part of it and my husband John said that he never really noticed the smell of my bag when I was just sitting around so I didn’t really need the deodorizing part either so I stopped using it.
An accessory that wasn’t an option for me is a stoma cap. This is only an option for those that have a colostomy and either irrigate or have  very predictable output. The cap is really just a small closed-end bag that you wear on your barrier and it’s just the size of the barrier basically. It’s only meant to be worn for short periods of time when a full-size bag could get in the way like when playing sports, when swimming, or during intimate moments. The bag doesn’t really hold any waste at all so it’s mostly just there to keep your stoma from touching things because the stoma is always wet.
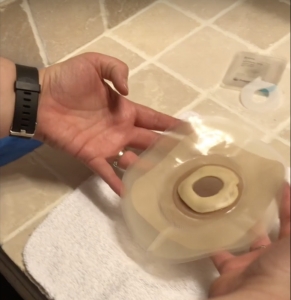
And last but not least are support belts. There are different kinds that offer varying types of support for your bag. The simplest kind is basically just a fancy piece of elastic that’s got hooks on either side. Most of your barriers will have some kind of little thing like this where you can click the end of the elastic in on both sides and it basically just kind of holds it up against your body a little bit better than just it being on its own. There are also support belts that have a large round hole, you can see pictured here they put pressure on your barrier to help keep it snug against your body and
 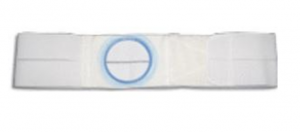 protect you from getting a hernia. I got one of them but once I switched to the Coloplast bags the hole on the belt ended up being too small and it would bunch up the barrier so it’d be really uncomfortable and I was afraid that it was gonna cause my system to prematurely leak so I didn’t really use it a whole lot. There are even fancier support belts that you can get that will hide the entire system that you could even stick
 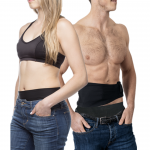 your bag into. I didn’t invest in any of those because I knew my ileostomy was only gonna be temporary. But I had a friend who knew that she was gonna have hers for a long time and she invested in a Stealth Belt. It was expensive but she said it was worth every penny.
 Another alternative that you can use is a pregnancy belly band. I actually had one leftover from my pregnancy that I hadn’t gotten rid of so I used that as a cheap alternative to the Stealth Belt. It wasn’t the same of course, but it did hold the bag up close against me, kept it from bouncing around, and hid it really well. That is a lot of stuff!
Now just because I talked about all these things doesn’t mean that you need to use all of them. It’s definitely a trial and error kind of system because everybody’s body’s, skins, stomas are all different so you just kind of have to experiment with what works best for you. Once you’ve met your annual insurance out-of-pocket, which if you’re a fellow cancer patient isn’t gonna take you long to do, you can try a lot of these different products for little to no cost thanks to your insurance. Take advantage of stocking up on some supplies when you can so that you’re prepared in case there are shipping delays or you go through a string of a lot of bag leaks and you go through a lot of bags and barriers having to change them a lot because of those leaks.
One other really good resource that I want to mention to you guys if you want even more information on how exactly to use some of these supplies check out the Vegan Ostomate, I’ll have the link for his channel up here, Eric is the owner. He has a lot of excellent videos that go into much more detail because he currently has an ostomy so he can actually demonstrate on himself how a lot of these things work and how you can use them so check his channel out for further resources on ostomy supplies and living with one.
In my next video, I will talk more about all the ups and downs of having an ileostomy and some tips on staying active and traveling with one. If you’re not subscribed to my channel yet make sure you’ve clicked on the subscribe button and hit the bell so you’re notified when all of my future videos are posted. Please give me some love and click on that like button down there too and thank you so much for watching.
*This video was originally published on July 3, 2020