What do you say when a friend or someone that you love has been diagnosed with cancer? You want to be there for them and comfort them but you also want to make sure that you’re not saying something that’s going to upset them or make them feel even worse than they already do. Well, I am here to help. How do I know? Welcome to Life as a Cancer Survivor. My name is Jelena and at age 34 I was diagnosed with stage 3 rectal cancer. Throughout my time as a survivor, I have immersed myself in the cancer world and made tons of friends within that along the way. Throughout our journeys, we vent or share some of the best and worst things to say to a cancer patient, so I’ve compiled a lot of those together for this video. So let’s get started with the good stuff, things to say.
Things to say to a cancer patient
I love you.
When it’s a loved one that’s telling you their diagnosis it’s always good to start out with and “I love you” as a comforting reminder that they aren’t alone in this.
I’m sorry that you have to go through this.
This acknowledges that you realize that what they’re going through is very difficult. I’m here to listen. Telling them that you’re there to listen shows them that you care for them and that the focus of the conversation will stay on them and not on you when they need to talk. A person goes through tons of emotions when they’re diagnosed with cancer and those emotions can change from one minute to the next so letting them know that you’re there to listen gives them another person that they know that they can turn to if they need to talk.
Can I bring you dinner tomorrow?
Or any specific thing that you want to do to help. It doesn’t have to be tomorrow but give them an exact date. If that date doesn’t work then the patient can offer an alternative right there for you. And it doesn’t have to be dinner either it could be groceries, snacks, tea, coffee, offering to walk the dog, or babysit. They’re overwhelmed with so many things that it’s easier for them to just say yes or offer a quick alternative rather than leaving an open-ended date for something.
Would you like for me to take you to any of your appointments?
Even if they have a significant other, that other person may not be able to take time off of work to accompany them to every single appointment because there’s going to be a ton of them. A lot of information is covered in those appointments so it’s always helpful to have a second person there to help with remembering all that information. Sometimes these appointments can get emotional too and it’s nice to just have another person there with you that can help to comfort you that’s not your doctor.
I’m thinking about you.
This one is good once treatment is started just to let them know that you haven’t forgotten about them.
Would you like to come to. . .?
Don’t assume that they aren’t up for anything social. Keep inviting them to things and let them determine whether or not they feel well enough or have enough energy to accompany you to those things. Not inviting them makes them feel like you’re abandoning them and that you’re not there for them at a time when they really need friends and support.
Now for some things not to say. Don’t fret if you’ve sent any of them because I’m guilty of having said a few of them as well. A lot of these, they’re said with the best of intentions but I’ll explain why they may not be the best things to say to a patient.
What NOT to say to a cancer patient
At least.
It minimizes what they’re experiencing and feeling. You can almost always find someone that has it worse but that doesn’t mean that others that are struggling aren’t having a hard time too.
Let me know if you need anything.
They are so overwhelmed that they have no idea what they need and once they do realize that they’re in need of some stuff they don’t have the time or the energy to try to figure out who could do what for them. Take a note from my “What to say” section and tell them that you’re bringing them dinner on Thursday.
You’ll be fine.
You have no idea what their prognosis is and even if you do every person is different and you have no idea which side of the statistics that this person is going to fall into.
Don’t worry. It’s no big deal. It could be worse.
A cancer diagnosis is a big deal, even if it’s caught early and can easily be treated. They’ll have this cloud of cancer following them around for the rest of their lives. Saying one of these is similar to giving the “At least…” line, which minimizes what they’re feeling and can make them feel even worse for having any kind of emotion about this.
My aunt’s neighbor had the same kind of cancer and they died.
This obviously doesn’t help at all other than to increase their anxiety about their diagnosis. Even if you’re bringing this up to try and compare treatment plans it’s not helpful. Our minds already think the worst when we hear that we’ve been diagnosed with cancer we don’t need to hear about other people that have died from it. Plus, you’re stealing the conversation by focusing everything on you and your story.
Everything happens for a reason.
A cancer patient doesn’t want to hear that maybe there’s some dark, behind the scenes reason that they got cancer. Just say, “I’m sorry this happened to you,” and move on.
Tomorrow isn’t guaranteed. I could get hit by a bus tomorrow and be dead.
You don’t worry every day that the bus is going to hit you and you’re going to die. You don’t have nightmares about the bus hitting you and killing you. And you don’t go to bed worrying about whether or not that bus is chasing you. Cancer is always looming over our heads. The bus is not.
It’s the “good” kind of cancer.
There is no good kind of cancer. They all suck in their own way. Saying that they have the “good” kind is again like saying, “at least,” don’t say it.
You should. . .
Are you an oncologist? Then you have no business giving them any kind of medical advice. Don’t tell them they should be doing this or they should be feeling this. We’re all different. We all handle treatment a little different, recover different, our emotions are different, so it’s up to us to figure out what’s best for ourselves. Unless we’ve asked you for advice, please don’t give any.
They lost their battle.
When a person dies from cancer, pleasedo not say that they lost their battle. They tried their hardest to beat their cancer and saying that they lost implies that they’re a loser and they gave up. If it was solely up to a person’s will there would be a heck of a lot more people that would be beating cancer but that’s not how it works. Also, the cancer dies with the person so it’s a tie at best.
This is by no means an exhaustive list but hopefully, it gives you a good starting point of some good things to say and to avoid saying. Want a printable version of this list? Click here to download this handy infographic to use and to share.
Let me know down in the comments below if there are any really important ones that I’ve missed. Want to hear what it’s like to be on the receiving end of getting a cancer diagnosis? Click here to read about my diagnosis story. Thanks for watching.
Click here to download a printable version of Talking to a Cancer Patient.
*This video was originally published on January 8, 2021
FOLFOX Chemo Side Effects and Tips to Deal With Them
Hi everyone! In this video, I’m gonna dive deeper into the side effects that I experienced while on the IV chemotherapy FOLFOX and some tips and tricks that I either learned or figured out to help manage them. In case you’re new here, welcome to Life as a Cancer Survivor. My name is Jelena and in May of 2016 I was diagnosed with Stage 3 Rectal Cancer. This channel, I started to show you what life is like as a young Colorectal Cancer survivor and how life is both during and after treatment ends. You can also follow me and my life adventures over on either Instagram or on Twitter the handles are popping up over here but I’ll also have links that will take you directly to my profile so you can follow me down in the description below. So come on over and say, “Hi!”
I received eight rounds of the IV chemotherapy FOLFOX starting on December 13th, 2016. Within the first hour of that infusion, the side effects started kicking in. I had been sipping my water the whole time off and on, but all of a sudden when I took a drink and I swallowed, it felt like I was swallowing glass. It really startled me and I wasn’t sure if I was just going crazy or if that actually happened so I took another sip and the same thing happened so I realized that must be the cold sensitivity that my Physician Assistant or my PA had been talking about when I went to the chemo training class and why they recommend drinking only warm beverages for those first few days at chemo and after receiving chemo.
I would go in for chemo on Tuesdays then usually around Saturday sometimes a day or two later, that cold sensitivity of my throat would go away by then. But in the meantime, it was warm water only for me. I usually just sip water throughout the day so I would have to keep reheating my glass of water over and over in the microwave because even at room temperature it still felt like I was swallowing glass so it had to be warm water that I was drinking. By the second or third round of chemo, the water started tasting like rubbing alcohol to me. So I had to have my husband, John, taste test it to make sure that something weird wasn’t going on with our water at our house. He said it tasted normal so it was just my tastebuds changing and causing that water to taste like rubbing alcohol.
Here are some tips and tricks that I learned or figured out to help with managing that called sensitivity in my throat and that bad water taste without overdosing on sugary drinks:
-Add some apple juice, or your favorite juice to a glass of water. I would do a mixture of about 25% juice 75% water, and that helped with taking that bad taste of the water away. On the days where you’re experiencing cold sensitivity, warm that glass up in the microwave after you’ve mixed the juice and the water together.
-Flavored sparkling water like La Croix, Bubly, or just your favorite grocery store brand of sparkling water is a good way, a good thing to drink to help keep you hydrated on those
days that you’re not experiencing the cold sensitivity but when water tastes nasty.
-Herbal tea is another beverage that you can drink either hot or cold and also you can sweeten it easily to your liking. My favorite ones are the fruit flavors Celestial Seasonings teas, but any of the fall and winter flavors of their herbal teas are also delicious.
Other cold sensitivity side effects that I experienced were, the first one was when cold wind would blow in my face it would be like a stabbing pain like needles stabbing me in the face. I would try to cover up with a hat and a scarf to hide as much of my face as possible but the wind would still sneak in somehow and I would get that needle stabbing feeling in my face. One other cold sensitivity side effect that I also experienced was I needed to wear oven mitts to grab stuff out of the refrigerator because if I touched cold things with my hands it felt like I was getting electrocuted in my hands as soon as the cold hit my hands so, the oven mitts protected me and kept that feeling of being electrocuted constantly away from my hands.
One major side effect that you’ll experience most likely no matter what chemo that you’re on is fatigue. My Oncologist’s PA mentioned when I asked about the fatigue, she said that it was gonna be more intense than the fatigue that I felt while I was on the oral chemotherapy Xeloda the summer before. So she was definitely right. When I would come home from my infusions at the cancer center I would go straight to bed and take a nap for at least two hours and that was in like the late afternoon. Then I was still exhausted after dinner and I’d be ready for bed at like 8 o’clock in the evening, which is unusual for me because I’m usually a night person. So I would go to bed at like 8pm and I’d fall asleep for two hours or so, but then I’d wake up and I couldn’t fall back asleep and I’d be restless all night and exhausted the next day.
Finally at my third pre-chemo appointment with the PA I mentioned that restlessness and the horrible time I was having sleeping and the PA she was like, “Oh, that’s most likely from the Leucovorin because it’s a kind of steroid that you’re getting in your infusion so let me prescribe you some Ambien to help you with your sleep.” So she told me to just take it for those three or four days at the beginning when I was really having a lot of trouble sleeping so I did and it worked like a charm. And I didn’t get any of the bad side effects like the sleep eating or sleep-driving while I was on it and I didn’t get addicted to it either so for me it was a good solution to help me with those temporary sleep problems.
Even with the Ambien to help me with sleeping at night, I still felt fatigued on many days. The fatigue is just different from feeling tired. Even when I would get a full night’s sleep and would nap I would still feel exhausted. Taking naps or trying to get out for some exercise which usually would perk me up didn’t work at all. There wasn’t really a whole lot that I could do beyond trying to get a full night’s sleep at night to help the fatigue other than to limit the amount of energy that I put out during the day and make sure I wasn’t pushing myself too hard or doing too many things.
So one change that we did make was we moved Maelle from half-day kindergarten to full-day kindergarten so instead of us having to go get her at 11:15am, she would be at school until 3:15pm, which meant that I had a lot more time to get in those naps during the day without her being at home, and we wouldn’t have to her I wouldn’t have to hurry home after chemotherapy to pick her up at 11:15 in the morning she was at school till 3:15pm, so that was stress that was taken off of me as well. Now I just had to keep her entertained for about two hours or so after school instead of from 11:15am to 5:30pm when John came home from work.
Another common side effect for anybody going through chemotherapy is nausea. I was written a prescription for two different anti-nausea meds Zofran and Compazine. The instructions I was given were on the day of chemotherapy I would usually get home early afternoon or so, I was supposed to take my first Zofran that evening and then every 8 hours for the next 2-3 days I was supposed to keep taking the Zofran. The Compazine was there in case I had breakthrough nausea or I got nauseous in between the Zofran doses I could take a dose of the Compazine to help. Well, after my first round of chemotherapy I suffered with nausea for a few days and the Compazine and Zofran didn’t really seem to help at all. I wasn’t throwing up but I didn’t have any kind of appetite and just felt nauseous. So after the second round instead of waiting until the evening to take the Zofran, I took it as soon as I got home from my chemotherapy and that seemed to work. So I just started those right away instead of waiting a few more hours which helped to kind of keep me ahead of the curve of nausea and kind of stop it before it started getting out of control. There are many other options of anti-nausea medications that you can take so if you’re struggling with nausea please talk to your oncologist and see if there are any other solutions that they have that they can that can help you.
The next side-effect that I had to deal with were muscle cramps in my hands. This would just happen while I was at chemotherapy and they would just kind of mostly tense up and it would be more difficult to try and move them like normal. I don’t really have any solutions to this but it was comforting to know at least that this was something that was going to happen and it wasn’t anything that was life-threatening just to keep me calm when it would start happening. Once the cramping went away, my hands just kind of in general were feeling weaker and even today three years later I have troubles with unscrewing lids on jars, when I’m typing I make a lot more mistakes, and even when I’m trying to play my violin moving my fingers quickly can be a struggle sometimes.
I also got neuropathy in my feet. It started out as a feeling like when you sit on your foot wrong and it falls asleep, then the feeling that I had was the part when your foot starts waking up. And that would usually only last for like a day or two but then as I moved further and further along through my rounds of chemotherapy it kind of started lasting longer and longer and by my last round of chemo, they decided to leave the Oxaliplatin out completely because that’s what causes it and they didn’t want to cause any further nerve damage.
The tingling then changed to the “my foot just fell asleep” feeling and I would only have that pins and needles tingling occasionally. I didn’t ever completely lose feeling in my feet but the neuropathy did make it harder for me to react quickly on my feet. I never really noticed it too much except like when we would go hiking I would feel a lot clunkier, and if I didn’t have the high-top hiking boots that I always wore there were many times where I would have snapped an ankle because I couldn’t have reacted fast enough on the rocky terrain to straighten myself up. Also when I would exercise or walk for more than a half-hour at a time, my feet would start burning. Wearing some compression socks that went over the calf did help a little bit but it didn’t completely get rid of that burning feeling. And then eventually every night when I would go to bed and lie down in bed that burning feeling would return to my feet. That’s when I decided it was time to try some acupuncture to see if that would help. It definitely wasn’t a quick fix, but I am happy to report that after two years of acupuncture treatment the tingling and burning did finally go away in my feet.
One more side effect was my sense of smell got thrown off sometimes. I noticed this the worst or the most when I would shower. The water coming down on me in the shower it would smell like cooked cabbage. Multiple times I called John and had him come over and smell the water while I was in there to see if it smelled to him, but he thought it smelled like normal so it was just me and my sense of smell was off and somehow the water smelled like cabbage. That also could be partially why like water when I would drink it would smell like rubbing alcohol. It was weird, there’s no solution that I came up with it, but it’s another strange thing to look forward to.
Of all of the side effects that I experienced during chemotherapy, the only ones that I still am experiencing 3 years later are weakness in my hands and fatigue. The fatigue partially could be from the anxiety medication that I’m currently on which causes fatigue as one of the side effects, but I was experiencing this fatigue even before I started those anxiety medications. It’s definitely not as bad as when I was on chemo, but I need 8 hours of sleep every night otherwise I am exhausted the next day and need a nap to make it through. I also get tired a lot more easily after exercising, doing housework, or doing yard work.
Do you have any tips or tricks on surviving through the side-effects of chemotherapy? If so help fellow cancer survivors out and let us know in the comments below.
Please make sure that you’ve clicked on the like button right down here so that YouTube knows you’re enjoying my videos and they’ll show them to more people. Also, make sure you’re subscribed so you never miss any of my latest videos and I hope you all are staying safe and healthy, and thanks for watching.
*This video was originally published on June 5, 2020
Today I’m going to cover my most requested topic: my ileostomy reversal surgery. So be prepared there’s going to be a lot of poop talk. My name is Jelena and at age 34 I was diagnosed with stage 3 rectal cancer. I had an ileostomy for over 7 months after my lower anterior resection, or LAR, surgery. The LAR surgery it’s where part of your colon and rectum are removed and the new ends they’re sewn together and you get a temporary ileostomy while that resected site heals. An ileostomy is where the end of your small intestine is run out of your abdominal wall to create a stoma and your waste exits your body through there. My ileostomy was reversed on June 4th, 2017 and this is my story on how that went how recovery was and a little bit about how things are today. I’ll also give you some tips on how to survive those first few days post-reversal.
The first step in getting ready for surgery is going in for a Flex Sig, which is short for a flexible sigmoidoscopy. They do this procedure to check and see visually how that resected site where your colon and rectum were sewn together to see how that’s healed. It’s different from a colonoscopy in that the camera – it only goes part of the way up your colon so it just goes up to the site where the colon and rectum were sewn together it doesn’t go through your entire large intestine. My procedure was done at the hospital by my surgeon and the prep for it was easy. All I had to do: I wasn’t allowed to eat after midnight, no drinking after 3:45 a.m., check-in was at 7:30 a.m., and the procedure was at 9:00 a.m. I was knocked out for it and when I woke up I was told that everything looked good and this test was passed. So this test, this procedure, was done five weeks before my ileostomy reversal surgery was scheduled.
Next up was a gastrografin enema test. Gastrografin is a water-soluble clear liquid that shows up on x-ray pictures and this test is done to make sure that there are no leaks at that resected site where your colon and rectum are sewn together. There was no prep for this procedure because they’re only looking in your large intestine and since I had the ileostomy there was no stool in my large intestine and you’re awake for this procedure. First I had to remove all my clothing from the waist down and put on a hospital gown, and while I did that, the tech prepared the gastrografin solution. You lie on your side on a table for this procedure and the first thing that the tech did was insert what was basically a deflated balloon with a tube running through it up my butt just past my sphincter muscles and then inflated that balloon so that the tube wouldn’t come out during the procedure. So that was not very comfortable. Then came the gastrografin so there’s over one liter of this fluid that gets pumped into you slowly into your large intestine. As it’s getting pumped in it gets more and more uncomfortable the more liquid’s in there and I kind of started cramping a little bit because of all that liquid being pumped in. Once the over one liter of fluid is in then you have to hold it inside of you and then the tech proceeds to take a bunch of x-ray pictures of you laying on your side, turning to the other side, on your back, with like your butt up in the air on your back in like a bridge position. It was, um, not comfortable.
When she had finished there was a bathroom connected right to that room and I pretty much just had to walk like six feet to get into that bathroom. So she said that the liquid shouldn’t come out before I get to the bathroom. Well . . . she lied. As soon as I stood up and took my first two steps I could feel some of that liquid dripping down my leg. I mean, my sphincter muscles haven’t been used in months, and even if they had been it’s really hard to hold liquid in, so I just rushed as quickly as I could to the toilet, sat down and a bunch of that fluid came out. I stayed on the toilet for about 10 minutes because I still felt like there was more in there that needed to come out, so there was another like round of the liquid coming out. But then nothing else was coming out, so I assumed all was okay so I got dressed and went home. But once I got home there was one more round of the liquid gushing out of me and then I was okay for the rest of the day. Thank goodness I passed the test and there were no leaks, so that meant I had the full go-ahead to get my reversal surgery.
This time I did a little bit of research ahead of time before going in for my surgery to learn a little bit more about what I should expect and what I should bring to the hospital with me. I only brought one pair of clothes because I knew from my previous hospital visits I wasn’t changing out that hospital gown until it was time for me to go home. I did bring a few pairs of underwear with me, though. I bought some adult diapers to bring with me and some diaper rash cream. I also learned that the usual criteria for letting a person go home after their reversal surgery is they first have to pass gas and then they have to pass a bowel movement. So since I knew I wanted to spend as little time as possible in the hospital, my goal was to take as few pain medications as possible, because those pain medications, they constipate you. So if I was constipated that means that would delay when my first bowel movement would happen.
My surgery was scheduled for 9 am on June 5th, 2017. My surgeon was also going to betaking my port out at the same time during the surgery because I was done with treatment and I was declared that I had no evidence of the disease so my oncologist said to go on ahead and get my port removed as well. The mood was definitely a lot different for this surgery versus my LAR surgery. I was excited to go in for this surgery because I couldn’t wait to get that ileostomy reversed. The couple of weeks leading up to this surgery, the skinaround my stoma was starting to get really red and irritated and I just didn’t really put a whole lot of effort into trying to figure out how to fix it because I knew that the ileostomy was going to be reversed. So I just got a prescription powder to put on the redness and sucked it up while I waited for that reversal surgery.
Surgery itself took about two hours and then I was taken to the post-anesthesia care unit, also known as the PACU, to wake up before I got sent to my hospital room. It took me longer to get out of the fog of anesthesia and it was making me anxious and apparently, I started freaking out because I was really disoriented, but I don’t remember any of this at all. They didn’t give John specific details as to what I was doing or saying they just told them that they were going to hold me in the PACU for a little bit longer while they made sure that I was calm before bringing me up to my room.
I was immediately allowed to start on the clear liquids diet once I was up, so that meant it was time to start on the jello and vegetable broth diet. I was being given Tylenol to manage my pain, but the pain was much more tolerable than with my LAR surgery. It was only like a two or three on the pain scale. Maybe because they just had to sew the hole in my small intestine up and basically just shove it back inside of me, and then take my port out. The hole where they put the stoma back into me, they didn’t even sew that shut they just packed it with gauze and then loosely covered it with a bandage. the port scar is pretty gnarly looking as you can see from this picture I thought it looked like I had lips on my chest and, even to this day, the scar is still pretty big and noticeable. Let me show you. Here’s what it looks like.
I was able to move around in my bed and even get up and walk on that first afternoon in the evening. I was really pleased with how much easier this surgery was and hoped that that meant that I was going to be able to get home much faster. The next morning around 5 am I passed my first fart out of my butt in months. Passing gas is that first step in showing that your bowels are waking up and working, so I was upgraded to the full liquids diet forbreakfast, and then got moved up to the soft foods diet for lunch. I spent the day just walking the halls because walking is supposed to wake your bowels up faster than just lying in bed. Plus, since I wasn’t really in a whole lot of pain, I didn’t want to just lay in bed anyway since there wasn’t anything else to do other than watch tv or walk. I also started having some mucus leak out of me and got a spot or two on the chucks pad on my bed and messed up one of my pairs of underwear. So then I switched over to wearing the adult diapers.
Right after gauze removal
Wednesday morning I had my first bowel movement and it seemed normal. But in anticipation of the rest not being very normal coming very soon, I made sure to put some diaper rash cream on my butt to protect it. Having a bowel movement meant that I could be discharged, so I was super excited about that. To prep me for going home, first they took the gauze out of my stoma hole wound at about 7:30 a.m then by 9 a.m it was completelyclosed up already. It was really weird. Here’s the picture progression. I believe they leave it open and let it close itself up because if there’s any little traces of bacteria they want it open so that as it closes up it kind of pushes that out instead of having it sealed or having
90 minutes after gauze removal
it sewn shut and the bacteria is trapped inside. My surgeon’s directions for eating once I got home was to just eat like normal, no diet restrictions at all. My follow-up appointment with him was scheduled for two weeks from that discharge date and he said that he wanted to give my bowels time to adjust and regulate to being normal again and didn’t want me taking any kind of medications to regulate them for at least a month.
Once I got home though, that’s when the literal poop storm began and all hell broke loose. Anytime I stood up, it felt like all the waste inside of me just rushed down immediately and I had to hurry as fast as I could to get to the bathroom to let it out.
Once I was on the toilet though, not a whole lot came out. It felt like more needed to come out but nothing ever did. Every bowel movement was a six on the Bristol scale. If you’re unfamiliar with the Bristol scale, it’s a chart that rates your bowel movements. Let me show you the chart. A four is the normal that you want to strive for. One and two on the scale mean that you’re constipated, a six or a seven are considered diarrhea.
The first few days were spent just lying around on the couch because anytime I stood up I had that feeling that everything in me was rushing out and I would have to go to the bathroom. Even when I was lying on the couch though all day I still had almost a constant feeling that I needed to go and pass a bowel movement. I tried to hold it for as long as I could before going to the bathroom in an attempt to try and retrain my bowels so that they weren’t sending me those signals that I needed to go constantly. This wasn’t anything that a doctor told me it was just something that in my head I thought maybe would help. Instead of wearing an adult diaper I switched to wearing pads and just positioned them to the back end of my underwear to catch any leaks. I never had any like full out accidents so the pads were plenty good enough to just catch the little bit that would leak out occasionally. I didn’t count how many times I was going to the bathroom those first couple of days.
But by Saturday I was going so much I decided that I needed to track this so that I had actual data to give my doctor when I went in for my follow-up appointment rather than just saying “I’m going all the time,” I would have an exact number to tell him “I went this many times on these days.” I downloaded the My Symptoms tracker onto my phone and in that,you can keep track of your food, medications that you take, uh you can also track your bowel movements, where they fell on the Bristol scale, and also even track how urgent those movements are on a scale from zero to ten. Before I go through that tracker with you let me quickly tell you that before cancer I would usually have one bowel movement a day, it would be a four on that Bristol scale and I’d be in and out of the bathroom within five minutes.
So here’s what Saturday looked like. I had a total of nine bowel movements but I’m almost positive that I didn’t start tracking them until after lunch so I’m sure there was at least one or two before that very first one right before lunchtime. As you can see, the urgency was pretty high all afternoon and into the evening. The bathroom visits did not let up overnight on Saturday night so as you can see I didn’t really get a whole lot of sleep that night. You know how much your butt hurts after just like one or two episodes of diarrhea? Well imagine that, but going like 10+ times a day. That’s basically what I was experiencing.
My butt was getting really raw and it was burning every time that I was going even though I was putting diaper rash cream on after every visit to the bathroom. I felt like I basically lived on the toilet on Sunday with a total of 17 visits, and almost all of them were urgent but it did let up for Sunday night so that I could get some sleep. Sunday was also the first day that I saw my first fives on the Bristol scale, so we had moved from a six to a five so there was a little bit of good news there. Monday I had 12 bowel movements that were pretty much looking like peas and marbles, and my butt was so raw the diaper rash cream wasn’t helping at all anymore. I used some Dermoplast on my butt to try and cool it off a little bit but since I was going to the bathroom basically like every hour it wasn’t really working for very long.
Tuesday I started the day with two bowel movements before breakfast, another four before lunch, and my butt just couldn’t take anymore, so I turned to the internet to see if I could get any ideas of anything that I could do at home that didn’t involve medication to help me. The overall consensus was that my surgeon was crazy for telling me to just eat a normal diet and that most other people had been told to eat a low-residue diet when they came home from their ileostomy reversal surgery. So what exactly is the low-residue diet? It basically limits the amount of high fiber foods that you eat such as like whole-grain cereals, whole-grain breads, nuts, seeds, raw fruits, raw veggies with the goal of you having fewer bowel movements and smaller bowel movements. What you want to do is look for foods that have one gram of fiber or less per serving. This diet is only meant to be followed temporarily because it’s really hard to meet all your dietary needs on it.
So what foods can you eat? White bread, white pasta, refined cereals, canned fruits andvegetables, milk and foods made from milk like cheese and yogurt, tender meats, eggs, tofu, butter, margarine, and dressings without seeds. You want to make sure that the foods that you cook they’re soft and they’re tender. And you also want to make sure that you drink plenty of water so that you don’t get constipated. I sent my parents to the grocery store Tuesday afternoon with a list of all of the stuff on the low-residue diet so that they could buy me stuff and I could get started with this diet ASAP. It did help some because Wednesday and Thursday I only had eight trips to the bathroom on each day and I was brave enough to go outside and walk up and down my street so that I was still close by in case I did get an urgent feeling to go I was close enough to a toilet.
Then Thursday I started having poop that was a number four on the Bristol scale. Friday the urgency of my visits started going down by a lot too. There were still some that were urgent but I felt like I was finally making some progress. Saturday the number of visits went back up to 16, but they were pretty much all a number four on the Bristol scale, and I believe part of the reason I went so many times was because when I was in the bathroom just to urinate I would also just pass a little bit of stool also.
Then on Monday, I started to get nervous about having to go to my surgeon the next day for my follow-up appointment. The drive to his office was about 20 minutes and I was really nervous about making it to and from his office without pooping myself. Then Tuesday came and I surprised myself and made it to and from the office without an accident. During the appointment, my surgeon looked at the ileostomy wound site and said everything looked like it was healing just fine. Then he asked how my bathroom visits were. I told him it was really bad and painful and that I started a low-residue diet the week before to try and slow things down and to let my burning butt heal. He got mad at me for restricting my dietand said he would start me on some medications so that I could get back to eating a normal diet. He said that I could take Metamucil to bulk up my stools and I could take one Imodium daily to slow them down. But he didn’t tell me to avoid taking them at the same time.
After a few weeks of taking both of them, I found out that you’re not supposed to take any medications within two hours of taking the Metamucil because the Metamucil can reduce the efficacy of those medications. I took them both together that afternoon for the first time and I saw an immediate improvement in the urgency of my bathroom visits. I was still going a lot but by the next day I no longer had diarrhea and all of my bowel movements were fours or fives and I even had a three in there.
Wednesday night my sister and her husband flew into town to visit and by Thursday I was out on the town taking them around to all the touristy spots. I had nine bowel movements that day, but they looked normal and the urgency didn’t disrupt any of our activities that day. Then Sunday I was able to ride in the car for over an hour to take our daughter, Maelle to an overnight camp and I survived the ride back home without feeling like I needed to go urgently and without having an accident. Exactly three weeks from my surgery day I felt like I had improved enough that I no longer needed to track my bowel movements. I wasn’t completely back to my pre-cancer normal but my butt was healing, it wasn’t burning anymore, and I was confident enough to leave the house without being afraid of having an accident.
Exactly eight weeks after my reversal surgery I participated in Fight Colorectal Cancer’s Climb for a Cure and hiked for over eight hours on a mountain and only pooped once during that entire hike. That was a HUGE victory for me only having gone to the bathroom one time in eight hours. There would still be bad days but I wasn’t confined to a couch anymore and I felt like I had more control over when I actually needed to go.
Have more questions about how the reversal recovery process goes? Catch me live on YouTube on Thursday, September 17th at 12 p.m. Mountain Time. I’ll be on for about an hour answering all the questions that you have about the ileostomy reversal process and how things are going now. Make sure that you’ve clicked on the subscribe button and the notifications you’re getting all of them so you’ll be notified when I do go live and when all my future videos are posted. I hope to see a bunch of you on Thursday when I go live. Thank you for watching.
*This video was originally published on September 11, 2020
Welcome to Life as a Cancer Survivor. In today’s video, I’m gonna talk all about the different ostomy accessories, supplies, the companies, and how you use all of it. Yes, there are so many different accessories and stuff that it takes up an entire video. In case you’re new here, welcome! My name is Jelena and I was diagnosed with Stage 3 Rectal Cancer in May of 2016. As part of my treatment, I had surgery to remove 12 inches of my colon/rectum and while that resected site healed I had an ileostomy for 7 months. Now on to the ostomy supplies.
First, let me talk bags. There are three major ostomy companies, Convatec, Hollister, and Coloplast. I was sent home from the hospital with supplies from Convatec. Once I got home I called Hollister and requested some samples of some of their supplies based on a recommendation from my wound care nurse. In this day and age, most people don’t like making phone calls, but the reps were super nice and very helpful, especially if you’re new to the ostomy thing and unsure of what kind of stuff that you actually need.
Then after a few weeks of trying out the Hollister bags, I decided to call Coloplast to get some samples from them. They asked me when I called what kind of bags I was currently using, how I liked them, and if there were any challenges that I was having, and then they sent me a box of samples. They quickly became my favorite bags.
First, I didn’t have to fight with the clicking anymore. The Coloplast bags I got, they have a sticker a paper that you peel off and you just stick it right to the barrier. The part where it sticks to the barrier, it lifts up a little bit so you can squeeze that or pinch it together with the bag and make sure there’s a good seal all the way around. I never once had it fail on me.
The reason number two is that the bag itself it’s made out of more of a waterproof material so when you get out of the shower it takes maybe a minute or so to dry it completely off with a hairdryer. The third reason that I loved these is that the part where you empty it, it folds completely up into the bag. So let me demonstrate here let me open this up for you so you can see how it looks when you’re going to empty the bag, so here we go. So it empties this part it opens so that your waste drains out then after you’re done you know, wipe it off then you fold it up, you’ve got the tabs on the side, and then this goes in here and it’s completely hidden no germs on your clothes.
When I was discharged from the hospital I was sent home with a catalog, very thick catalog of all the different ostomy supplies to choose from. It was so overwhelming. So let me go over what a lot of those different options are. First is the 2-piece system. It’s the system that I used and it seems to be the most common one. So all it means is that the bag and the barrier are two separate pieces so theoretically you could wear the barrier for multiple bags you can take the bag off and replace it with a fresh one.
Different companies have different ways for you to make the opening on the barrier the correct size for your stoma. There are multiple barriers where this part here it’s more of like a clay-ish material and you roll it back and pinch it down into whatever shape that you need for your stoma. Then there are cut to fit barriers where you cut the hole yourself. They already have a little bit of a hole and then you just cut it larger to whatever size your stoma is. They give you like a stiff paper kind of guide that has a bunch of circles on it and you can lay it over your stoma to figure out the size and that’ll help you guide you on how big of a circle that you need to or a hole that you need to cut on the barrier. I also got lots of scissors from all the ostomy companies to use to cut the barriers. They’re more rounded so it makes it easier to cut in a circular shape and they’re a little shorter too so you don’t have a whole lot of extra blade to deal with while you’re cutting.
Then are pre-cut barriers that you can get. After a month or so after surgery when your stoma has kind of finally settled in size, if the opening is perfectly round then the pre-cut is the way to go. Mine was never perfectly round so even if I bought ones that were pre-cut I would still have to modify it so I figured why bother getting pre-cut if I’m gonna have to cut it anyway. I would still not recommend ordering more than about a month or so at a time of the pre-cut barriers for a while, while your stoma is still making some minor changes and getting settled in.
I also mentioned in my last video in the first week with my ileostomy that I had a lot of troubles trying to click the bag onto the barrier because my muscles were so sore and weak I couldn’t flex them to givea stiff surface to push that bag down onto the barrier. My wound care nurse recommended trying an accordion barrier that Convatec carries. As you can see from this picture the part of the barrier that the bag clicks onto can be pulled up so you can get your hand and fingers under it so you can pinch the two together to get it to click easily. This made getting the bag to click onto the barrier way easier but since there was that accordion bit even though it did flatten back down some it was still pretty bulky and it was more expensive than the traditional barriers so I only used a few of them at the beginning.
Next is the one-piece system. As you can probably guess the one-piece system is where the barrier and the bag are one piece, they don’t come apart. They’re good for you if you change the bag in the barrier at the same time and you don’t ever adjust the positioning of your bag. By that I mean, the ones that click together you can rotate the bag in the position that it is in on you so you can have it like down when you’re emptying it over to the side a little or if you’re wearing a special belt you can move it completely sideways but with the one-piece whatever position you put it on that’s where it’s stuck.
Now onto the accessories. First up are powders. You can use stoma powder on the skin around your stoma to make sure that it’s perfectly dry before applying any kind of like barrier spray or wipe or even just putting the barrier on. Having dry skin before you get started is really important for your skin health and it also helps the barrier to stick much better. You apply the powder using a puff method so that kind of a cloud of the powder puffs out and gives more of an even coverage rather than having blobs all over.
Next up are barrier wipes and sprays. These are the first layer of protection that you can put down on your skin. Using a skin barrier helps protect your skin not only from the output but also from the adhesive from barriers. I started to develop a bit of an allergy to the adhesive, so using the skin barrier wipes would help keep my skin from getting as irritated from having that barrier down all the time. It also helps prevent the build-up of adhesive around your stoma and promotes skin health around the stoma. They come either in individually wrapped packages kind of like a moist towelette or in a spray. I used the wipe version and let’s say my stoma is up here on my chest I would start around the stoma and then I would wipe all the skin around anywhere where the barrier was going to be touching so everything underneath there I would use the wipe on.
Next up, barrier rings. These are good to help prevent leaks immediately around the stoma and protect the skin right around it. They’re also good to fill in uneven skin contours so that you have a flat surface to place the barrier on your body. So you can place these either directly on your skin or you can place them on your barrier. They’re pretty stiff when you first take them out of the package so to warm them up and make them softer you’ll want to just kind of like knead it in between your fingers and then you can stretch it, you can roll it, you can even use your scissors to cut it into multiple pieces. I would cut mine in two and I would put it on my skin directly. I would do the bottom half and the top half because of the uneven shape of my stoma it was just easier to do half at a time instead of the entire thing. An alternative to the barrier rings is barrier paste. It has the same purpose as the barrier rings it just comes in a paste or like a strip form which looks kind of like a piece of licorice. The paste, it comes in a tube so you just squeeze out however much you need. These can be better than using the ring if you just have small problem spots then you don’t have to use the entire ring you can just tear off a little bit of that licorice looking piece of paste or just squirt it out of the tube.
Another helpful accessory are barrier strips. These you put on the barrier, if the edge starts peeling up a little early before you’re ready to change it you can put these strips on and they’ve got the sticker on the back so they just peel off and you put these on to prevent the peeling. You could also use these if you’re doing extra-sweaty activities to help keep the barrier from peeling off. Another useful accessory are adhesive remover wipes. Sure, you could just peel the barrier off but the adhesive remover wipes make it a much gentler process and makes sure that you’re not peeling off skin with the barrier and you’re being more gentle on the skin. Since you’re gonna be wearing barriers on the exact same place for extended periods of time you want to be as gentle as you can to that skin around where the barriers are gonna be. So using the adhesive remover wipes you just have to peel the barrier back a little bit from your skin and then use the wipe right where the skin is meeting and just keep peeling it down until you get the whole thing off. Then after you’ve removed the barrier make sure that you wash all of that adhesive remover really well off of your skin before you get started with placing a new barrier on.
Next up is lubricating deodorant. This usually comes in a bottle and you put it in your bag either when you’re putting a new bag on or you can put it into your bag after every time that you empty it. This two-in-one liquid neutralizes the odors that are in your bag and it also makes it slippery so that your waste slides out of the bag much more easily. I used it for a while at the beginning, but then I realized that I had an ileostomy and everything was coming out pretty liquidy anyway so I didn’t really need the lubricating part of it and my husband John said that he never really noticed the smell of my bag when I was just sitting around so I didn’t really need the deodorizing part either so I stopped using it.
An accessory that wasn’t an option for me is a stoma cap. This is only an option for those that have a colostomy and either irrigate or have very predictable output. The cap is really just a small closed-end bag that you wear on your barrier and it’s just the size of the barrier basically. It’s only meant to be worn for short periods of time when a full-size bag could get in the way like when playing sports, when swimming, or during intimate moments. The bag doesn’t really hold any waste at all so it’s mostly just there to keep your stoma from touching things because the stoma is always wet.
And last but not least are support belts. There are different kinds that offer varying types of support for your bag. The simplest kind is basically just a fancy piece of elastic that’s got hooks on either side. Most of yourbarriers will have some kind of little thing like this where you can click the end of the elastic in on both sides and it basically just kind of holds it up against your body a little bit better than just it being on its own. There are also support belts that have a large round hole, you can see pictured here they put pressure on your barrier to help keep it snug against your body and protect you from getting a hernia. I got one of them but once I switched to the Coloplast bags the hole on the belt ended up being too small and it would bunch up the barrier so it’d be really uncomfortable and I was afraid that it was gonna cause my system to prematurely leak so I didn’t really use it a whole lot. There are even fancier support belts that you can get that will hide the entire system that you could even stick your bag into. I didn’t invest in any of those because I knew my ileostomy was only gonna be temporary. But I had a friend who knew that she was gonna have hers for a long time and she invested in a Stealth Belt. It was expensive but she said it was worth every penny.
Another alternative that you can use is a pregnancy belly band. I actually had one leftover from my pregnancy that I hadn’t gotten rid of so I used that as a cheap alternative to the Stealth Belt. It wasn’t the same of course, but it did hold the bag up close against me, kept it from bouncing around, and hid it really well. That is a lot of stuff!
Now just because I talked about all these things doesn’t mean that you need to use all of them. It’s definitely a trial and error kind of system because everybody’s body’s, skins, stomas are all different so you just kind of have to experiment with what works best for you. Once you’ve met your annual insurance out-of-pocket, which if you’re a fellow cancer patient isn’t gonna take you long to do, you can try a lot of these different products for little to no cost thanks to your insurance. Take advantage of stocking up on some supplies when you can so that you’re prepared in case there are shipping delays or you go through a string of a lot of bag leaks and you go through a lot of bags and barriers having to change them a lot because of those leaks.
One other really good resource that I want to mention to you guys if you want even more information on how exactly to use some of these supplies check out the Vegan Ostomate, I’ll have the link for his channel up here, Eric is the owner. He has a lot of excellent videos that go into much more detail because he currently has an ostomy so he can actually demonstrate on himself how a lot of these things work and how you can use them so check his channel out for further resources on ostomy supplies and living with one.
In my next video, I will talk more about all the ups and downs of having an ileostomy and some tips on staying active and traveling with one. If you’re not subscribed to my channel yet make sure you’ve clicked on the subscribe button and hit the bell so you’re notified when all of my future videos are posted. Please give me some love and click on that like button down there too and thank you so much for watching.
*This video was originally published on July 3, 2020
As a continuation of last week’s video of what the different ostomies are, this week I’m gonna share with you what it’s like to do a full appliance change on a colostomy bag. If you don’t remember that you must be new here, so welcome to Life as a Cancer Survivor. This channel is here to give you all the ups and downs, ins and outs of what life is like once you hear those words “you have cancer.” My name is Jelena, and in May of 2016 I was diagnosed with Stage 3 Rectal Cancer. For all of my newbies, make sure that you’ve hit the subscribe button either right below the video or the link is in the description right below and you’ll never miss any of my new videos.
Last week I interviewed Shiray, a Stage 4 Rectal Cancer survivor that’s also an advocate for the organization Fight Colorectal Cancer. I wanted to talk to her so that she could educate us on what a colostomy is since she currently has one. She very graciously offered to record her bag change after our interview. Then once she sent all the videos to me, she had a lot of good information in there and I didn’t want to really cut any of it out but it takes a while to do the change and to explain everything so I thought just making it it’s own video would be best so that you can see it all together and not have any of the bits cut out.
She starts off with how she lays out all the supplies before she gets started with anything. Then she takes the bag off and then of course she shows how that bag, the new bag attaches to where the stoma is. So without further ado, here’s her video.
(Shiray) So here’s what I use when I change my bag. I have these blue Equate gloves, you can get them at Walmart. I have adhesive remover wipes by Brava. I have Ivory soap to clean the area this one’s really good because it doesn’t have any moisturizers in it. I use Head & Shoulders because the zinc in it helps protect my skin so I kind of lather it up at the end and then put it on my stoma on the skin around my stoma and just let it sit for a little while. And then rinse it off and I’m ready to put the new back on. These are called barrier strips and I place these on the outside of the flange kind of like that. I use two of them so I can go all the way around.
This is a barrier ring and this goes on the inside of the flange right here to help create a better seal. This is the flange I use the Hollistertwo-piece drainable system and this one has a convex on the back which pushes my stoma up. This is my pouch, it’s open right now and it just connects to the flange with the rings. And then I bought a bunch of these white cloths from Walmart that you can bleach and they come in handy. So before I get in the shower I always put my piece together so that it’s ready to go as soon as I get out so I put one of these cloths down just to keep my counter sanitary and I get these rings, or these barrier strips. I take the protective back off of it and I lay it really carefully, these are really easy to mess up, they fold up on each other and they stay folded. So I get those two ready.
Next thing I do is get my flange. There is a backing on it that peel off and I keep because this makes a really good fan for when I get out of the shower. I take off these paper strips on the side and again this is all done really carefully just so you don’t ruin the appliance. I place it down and then I want to place the sticky side up on these strips. If it folds under it’s okay as long as it doesn’t fold together and so I just repeat it on the other side making sure that the ends of this meet I use these barrier strips because I ended upbeing allergic to the adhesive that’s on this brown material and so these strips help protect my skin. So I leave that there, I get my moldable ring this is the same kind of material that these strips are made out of. Take off all the extra papers and I kind of pull it out a little bit just to make the opening wide enough to fit over the flange. And I place this around the edge. And it’s moldable so you can move it around and kind of play with it to get it flat then I just lay that to the side. And it’s ready to put on as soon as I get out of the shower.
So this is what my bag looks like at the end of the week, you see some discoloration here but that’s just the fuzz from your shirts, I have dog hair on mine because I have three dogs. This is where I start using the gloves I just put two on just to make sure that my hands are protected from what’s inside the bag. I also use little trash bags that come with the pouches, and I take my adhesive remover I like to use two just so I can get all the glue off. It’s just a moistened towelette and I just start working along the edges. You want to make sure not to pull it too hard because you’ll rip some skin off, some hair, anything that’s on your belly and it can cause irritation that will keep your bag from sticking the next time. I’m just running along the edge I don’t want to go too fast. And I just keep going around until it’s completely off. So I just take my bag once it’s completely off and I put it inside of the trash bag and I leave this bag so I can get all of the extra stuff from all of this change so all of these papers will go in everything will go in. So I’ll get in the shower and I’ll show you what it looks like afterwards.
Okay, I’m out of the shower and so once I got out just so no stool gets out on me after I’mcleaned I protect myself with one of these rags and I also have a small piece of toilet paper rolled up underneath that’s covering my stoma directly and this just protects the rag. I bleach these but I still like to have just a little extra layer of protection. So with the tissue, you do have to peel some pieces off you can take the edge of your rag and rub them right off. So I do have some irritation here on the bottom of my
Stoma with irritation
stoma so I’ll make sure to change my bag in a day or two just to make sure that that’s not getting worse usually it heals on its own without any issues but just to make sure.
So now I want to make sure that my skin is completely dry so I get that plastic piece from my flange and I just kind of fan it off. So while I’m drying, this is my incision from when I got my colostomy they had to open me up after trying to do it laparoscopically, and then you can see that I just have one hole so that’s the end colostomy. If there was a second entrance here below that would be called a loop colostomy.
So I just make sure I’m good and dry make sure I’m clean keep tissue close by so ifsomething starts coming out you can wipe it off if it gets on your skin you have to start the whole process over again so now I take my flange that all my stuff on it and I sort of line this up in the mirror. Once I know for sure it’s good and I can set it down I just kind of work my way from the inside out.
Make sure it’s set up, I’m watching it in the mirror so I make sure that no stool is coming out but I just try to push this for a little bit just make sure it gets a really good seal. A little wrinkle here and there is not a big deal you just want to make sure that the piece that’s connected to your skin which in my case is this isn’t wrinkled or folded up on each other because that’s where you’ll have your failures. Then I take my bag, the pouch, it’s got a little grommet. And so I start at the bottom just so I can see it, and I just push it on.
And it’s still open so any air that’s coming out right now will come out of the bottom but I just go around and make sure that it’s sealed all the way around. And then I flip that up, secure it with the velcro piece, double-check it, make sure it can’t come loose, and I’ve got a new bag.
Now that you’ve watched her change her bag and understand a little bit more of what the different supplies are and the terms for them, I’m going to show you how my bag change differed a little bit from hers. So as you can see from this picture my stoma opening is not perfectly round. I would get barriers that have an opening that I would need to cut so I would use these special scissors that the ostomy companies sent. They’re not sharp at the end so I would cut this so that it would be just the right opening for my stoma. After the skin around it was perfectly clean and dry I would use a skin barrier wipe so they come in these little like packages so I would use this and I would wipe it all around where the stoma was to kind of put a barrier between my skin and the adhesive from this barrier. Then I would use a moldable ring that I would place directly on my skin and try to follow the edges of the stoma. But it was hard because of the shape of it. Then I would place the barrier on, watching closely in the mirror to make sure I placed it in the right position based on how it was cut. I really struggled with getting the bag to click after my surgery using the bags like Shiray has.
After surgery my abdomen was so sore from everything that had just happened so pushing down trying to get that bag click, it was just misery and I struggled so hard, tears were shed trying to get them into place, struggle after struggle. Then I discovered the system which I used all the way up until my reversal which was a sticker one much more comfy for me.
So the barrier itself, it just has this big landing pad and the bag itself you peel off this and the whole ring part here is sticky and you just stick it on there. I never once had a leak where the two stick together so it worked phenomenal for me. And there you go now you’ve learned a little bit more about the appliances that you use if you have an ostomy and what a bag change looks like.
If you happen to have missed last week’s video on what the three major types of ostomiesare I’ve got the video right hereyou can click on that to watch it or the link is in the description below. Next week it’s surgery time so stay tuned for that. Thank you for watching and I’ll see you next week.
*This video was originally published on February 5, 2020
Welcome to Life as a Cancer Survivor. In today’s video, I’m going to talk all about what it’s like to go through IV chemotherapy. My name is Jelena and I went through eight rounds of FOLFOX chemotherapy to treat my Stage Three Rectal Cancer diagnosis. I was diagnosed with Rectal Cancer in May of 2016 and began the first of my eight rounds of IV chemotherapy in December of 2016. Click the like button down here below if you’re ready to hear about what it’s like to go through multiple rounds of chemotherapy.
A few videos ago I talked about the side effects that you could possibly experience while on chemo and the ones that I experienced. So in this video, I’m going to talk more about just the day-to-day happenings of what it really is like to go through chemotherapy. Let me start out with being at the cancer center for your infusion. Usually, there’s a special infusion room and there’s a nurse’s station in the middle of this large infusion room. At mine they kind of had it divided up into little “rooms” where there were half walls and within each of those rooms, there were about four to five chairs that you could sit at. Each of those chairs reclined, some of them had TVs at them, and others had an extra chair next to them so that a visitor could sit next to you during your infusion. I always got a pillow and put it behind my back but I would bring with me my own super cozy and soft blanket that my husband, John, had bought me. I would bring with me a pair of cozy slipper socks and I would take my shoes off and just put those slipper socks on since I was there at the infusion for three hours. I would also bring water, either snacks or a lunch depending on what time my infusion was, my phone of course, and then a tablet and headphones. John came with me for many of my infusions but he would bring his work laptop with him and many times he had meetings that he had to attend so I couldn’t rely on him as my sole source of entertainment. So on my tablet, I downloaded games, I downloaded some tv-shows and used those to keep me occupied and that’s where the headphones came in handy for listening to the tv shows. I also let my mom, sister, aunt, and one of my cousins know what time my infusions were and they would keep me occupied in a group text with just funny texts or gossip. Personally, I could never fall asleep during the infusions.
I mentioned that you’re there for about three hours for, you know, for your infusion. I had a port implanted which is a device that goes into your chest and it has a small tube that comes out of it that goes into one of your large veins. Once you’re hooked up to the IV and the chemo pumps through a needle that’s inserted into your port you’re not stuck in that chair the entire time. The nurses showed me how to unplug the chemo pump because it had a battery in it as well so it could run for a little while without being plugged in. So they showed me how to unplug it and take the pole with me to the bathroom because I had to go multiple times during the infusion. At my cancer center, they had three to four individual bathrooms that were large, accessible-sized bathrooms so even with you and that chemo pole you didn’t feel cramped inside the bathroom at all and had tons of room to maneuver around in there.
Once I was finished with the in-person chemotherapy, I got disconnected from that and connected to a chemo pump that would dispense chemo to me for the next 46 hours. They gave me a fanny pack and an over-the-shoulder bag that I could choose from to put that pump into for carrying it around for the next two days. I chose the over-the-shoulder bag because it was more comfortable and the fanny pack was actually too big on me even when I pulled it as small as it could get it was still too large. So then once I got home I would always immediately go to bed and take a nap for at least two hours. You’ve been through a lot physically and mentally at chemo, so most people that I know go and take a nap as soon as they get home. The headboard of my bed has a post on the end of it so I would hang the bag on that and tuck the hose into the bag as much as I could so that I didn’t have to worry about getting tangled up in it and I didn’t have to worry about my cats chewing on that hose. The hose was about three feet or so long so there’s a lot that you can work with to figure out where exactly you want to put the pump when you’re sleeping to be the most comfortable.
So for the next two days, that pump went everywhere with me. I felt pretty cruddy but I tried to not use that as an excuse to not do anything. The bag fits nicely into the water bottle holders on a treadmill so for my first rounds of chemo I would just put the pump in there and I would go to the gym and I would run. As I got further along in treatment I was too tired to run so I would only walk, and I would either walk outside or on the treadmill at the gym. I would only walk outside if it was at least 50 degrees because I was going through chemo in the winter in Colorado and Oxaliplatin, one of the drugs that’s in FOLFOX, it causes extreme cold sensitivity and if I would go outside and it was colder than about 50 or if the wind was blowing strongly it felt like needles were stabbing me in the face constantly. So I wouldn’t subject myself to that I would just go to the gym and walk if it was cold or windy.
I asked the nurses at the cancer center if it was okay if I showered while I had the chemo pump attached to me and they told me that it was fine as long as I didn’t get the pump wet. They said that the dressing that was over the needle was waterproof so it was supposed to keep any water and sweat out and away from where the needle was. So to shower I would get a hanger, I used a metal hanger because it’s bendy and so I could bend it to whatever angle I needed it, so I would hang the over-the-shoulder bag on the hanger, and then place the hanger on the outside of my shower so the pump was on the outside and since you’ve got a long hose I would just untuck the hose most of the way and I showered with the chemo pump on. I wouldn’t scrub super hard around where the, um, the dressing was I would just soap up and then just let the soap flow over it but I never got it wet, never had any problems uh with any water getting in and doing anything to my port.
For sleeping at night I was worried about two things. One, that I was gonna get tangled up in the hose, and two that I was gonna forget that I had the pump attached to me and would get up and start walking away and get yanked by the pump still hanging on my headboard. As I mentioned earlier, I would hang my over-the-shoulder bag on the post of my headboard and then tuck the hose in as much as I could, that seemed to work and I never got tangled up in the hose when I was sleeping. As far as waking up and forgetting that I had the pump attached to me, whenever I’d wake up in the middle of the night and need to go to the bathroom I always wake up and I just lay there for a minute or two because I’m like, “Oh do I really have to get up or can I fall back asleep?” Of course, I could never fall back asleep but while I’m laying there and debating how long I’m gonna wait before I get out of bed, you would hear the pump disperse the chemo once or twice so that would be my reminder, “Oh yeah I’ve got that bag over here I need to grab that and take that with me before I go to the bathroom.” And in case you’re wondering what that pump sounds like each time that it dispenses the chemo, to me it sounds most like one of those automatic hand sanitizer dispensers put your hand under and it just dispenses um only it’s a little bit quieter than one of those.
On the days that my pump wasn’t attached, I would occasionally try lifting weights while I was at the gym. There were many movements that I didn’t do because they were too painful from the port location. First off I couldn’t lift my arm more than shoulder height without it being very painful on my at my port so that meant no jumping jacks or tricep stretches like where you do this it hurt to bring my arm up that high. It was also painful to do chest presses or stretches where you would take your arm across your body. Since I wasn’t hardcore into weightlifting I just did other exercises or avoided those stretches that hurt the port site.
I went into the cancer center on Tuesdays for my infusion, every other Tuesday to be exact, um then I would go back on Thursday right before they closed to get the pump detached from me. I would usually feel pretty crappy until Saturday or Sunday. Once the weekend hit the cold sensitivity started easing up so I wouldn’t have to warm up all of my beverages, the tingling in my feet would ease up, and I stopped my anti-nausea medications so the nausea was gone and I wasn’t as sleepy. The following week I would really start bouncing back. My energy increased and that just general crappy feeling started easing up. Then over the next weekend, I felt almost back to normal just in time for the infusion to get started again and that cycle to start on Tuesday.
My cancer center gave out vouchers, if you asked them, that were good for a season ski pass at Loveland Ski Area for only $89. Once you went to Loveland and got that pass you could also use it at multiple partner resorts to get a limited number of free lift tickets at those places as well. So the weekend right before my Tuesday infusion we went skiing multiple times. I would get colder than I usually would so I would have to bundle up with extra layers and covered up everything so there was pretty much no skin showing. I also invested in some of the hand/foot warmers and would put those in my boots and in my gloves to keep me warm, and even to this day if we’re doing anything outdoorsy in the cold I’d take those foot and hand warmers with me.
I did eight rounds of FOLFOX, so as I got further and further along in treatment the fatigue really started setting in and those afternoon naps started becoming almost a daily thing. My appetite went down but I was still eating okay when I went in for that last round of chemo. My hair, it definitely thinned out even my eyebrows and my eyelashes did but I started out with pretty thick hair, so to anybody that wasn’t my family it wasn’t really super noticeable. It was tough, but I knew that going through these eight rounds of FOLFOX would give me the best chance at living a long, cancer-free life so I just kept that finish line in sight. I just had to get through this and then treatment would be done.
Please click on the like button down here if this video gave you a better idea of what it’s like to go through chemotherapy. Also make sure that you’ve hit the subscribe button and clicked on the bell so you’ll be notified when all my future videos are posted. I know you don’t want to miss any of them. Thank you guys so much for watching!
*This video was originally published on July 31, 2020.
You’ve finished treatment for your cancer and your oncologist has declared that you have no evidence of the disease. Now what? Stay tuned because in this video I’ll be talking about what to expect next, from the follow-up appointments to treatment recovery. If you’re new here I want to welcome you to my channel Life as a Cancer Survivor. My name is Jelena, and in May of 2016 I was diagnosed with stage 3 rectal cancer. For my treatment, I went through 28 days of radiation and oral chemotherapy, I had a Lower Anterior resection or LAR surgery, which is where they remove your colon/rectum and I had an ileostomy created during that surgery, I went through eight rounds of the IV chemotherapy FOLFOX, and had my ileostomy reversed. So let’s get on with what happens after that treatment is over with.
My last round of IV chemotherapy was on March 28, 2017, and I was disconnected from the pump on March 30th, and on that day I was officially done with chemo. My treatment with my oncologist was complete so he basically said, “Bye, see you in three months!” When you’ve gotten used to going to the cancer center every two weeks for blood draws, pre-chemo appointments, chemotherapy, pump detachments, it’s a little weird knowing that you don’t have to go back for three months. Yes, I still had my ileostomy reversal surgery in two months but I didn’t have any more oncology appointments. No more visits to the cancer center. It’s a little nerve-wracking not being under constant surveillance and not actively working on killing cancer in your body. Now it’s time to attempt to heal for good.
The National Comprehensive Cancer Network has guidelines published for guidance on what a recommended follow-up schedule is for colorectal cancer patients that were diagnosed from stage one through stage four. Here’s the table that I’ll walk you through. There’s one column for patients that were diagnosed Stage one then another for Stage two, three, and four patients. For stage one, if you aren’t having any symptoms then the only recommended follow-up treatment is a colonoscopy after one year. If that one comes out clean, another one in three years, and if that one is clean another one in five years.
The follow-up schedule for patients that are diagnosed Stage 2-4 is much more comprehensive. First, we’ll start out with the appointment schedule with your oncologist. The first two years post-treatment is an appointment with your oncologist every three to six months and having your blood drawn every three to six months to get your CEA checked. CEA stands for carcinoembryonic antigen and it’s a protein in your body that in many people rises when cancer is present. It’s the least invasive and safest way to frequently check patients for whether or not the cancer has returned. After those first two years then the CEA checks and appointments get spread out every six months for the next three years. Since I was diagnosed at a young age my oncologist preferred to see me every three months for that first year and then he only moved it to every four months for years 2, 3, and 4. This past August was my most recent appointment with my oncologist and since my CEA has been consistently low and my CT scans have shown nothing, this was the first time that he felt comfortable spreading out my appointments so that they would be every six months.
Then for patients that are diagnosed at Stage 2 or 3, the follow-up appointment schedule for CT scans is every 6 to 12 months for 5 years. I had my first CT scan the day after I finished chemotherapy because I was hospitalized for an intestinal blockage, so that was kind of unintended, then I had another one 6 months after that and both of those they came back showing no cancer and my CEA agreed with that, so my oncologist then moved my CT scan schedule to once every year. For Stage 4 patients it’s recommended that you get a CT scan every 3-6 months for the first two years and then every 6-12 months for the next three years.
The final part of the follow-up schedule is a colonoscopy and it’s the same whether you were diagnosed at Stage 2 all the way through 4. If you didn’t have a colonoscopy at diagnosis, then it’s recommended that you get one 3-6 months after your treatment ends. For those that did get a colonoscopy before treatment, you wait a year for that first one. For me, I had mine one year after my surgery which was six months after my treatment ended. If nothing is found during the colonoscopy then you get to wait three years before you have to go in for your next one. If an advanced adenoma is found, which is basically a pre-cancerous polyp, then you only get to wait one year before the next colonoscopy. Of course, if the cancer returns then you stop this and you get back into treatment but this is what your schedule is going to look like for the next five years. Five years is the magic number because that’s when most cancer recurrences happen, so if you make it past that five-year mark without having any cancer detected then you’re done with your follow-up schedule. You just go in for annual physicals and you need to still follow what a non-cancer patient would follow as far as colonoscopy schedules go.
So you’ve got this follow-up schedule that sounds pretty intense but compared to being in the midst of cancer treatment it seems like nothing. You have to shift from actively going to appointments to kill the cancer in your body and having doctors and treatments rule your life to supposedly being in charge of your life again and going back to normal. I say supposedly because cancer treatment has most likely made some permanent changes to your body and that old normal can never be reached again. For me, I reached that finish line of treatment with scars from surgery, part of my colon and rectum missing, over a dozen lymph nodes gone, thinning hair, no menstrual cycle, neuropathy in my feet that caused constant tingling, and after the ileostomy reversal surgery, I was left with frequent bowel movements that required multiple medications to control. Three years after treatment has ended I’m still struggling with a white blood cell count that’s below normal and lymphocytes that are right at the bottom of the normal range which is great to have in the midst of a global pandemic. When I started treatment I naively thought that after treatment was done I would just magically be back to normal. Well, you don’t magically and instantly heal after having gone through multiple rounds of chemotherapy. There was no way that I felt like my pre-cancer self.
From instagram.com/thecancerpatient/
The mental game of trying to not wonder whether or not the cancer is growing back in between appointments can be tough. It’s not something that I thought about a whole lot, but it hit me front and center anytime I had to go into the cancer center to get my blood drawn and/or for scans. There’s actually a word for it in the cancer community and it’s called scanxiety. After attempting to move on with life you’re thrust back into the cancer center getting poked, prodded, and scanned. Your mind goes back to when you were first diagnosed, that uncertainty of how much cancer has ravaged through your body and wondering if it’s doing it again. After a few good scans and CEA test results you’d think that the scanxiety would let up a little. For me it did a little, but each test is different. Some tests don’t bother me at all now and other times just talking about it like right now has created a ball in my stomach. There isn’t just one magical thing that makes it easier either, because like I mentioned sometimes I feel the scanxiety and other times I don’t. You just have to come up with your own coping mechanisms of what helps to calm your fears a little bit. Fresh air, exercise, meditation, journaling, medication, alcohol, and marijuana are the most popular ways to cope and it’s usually not just one but a combination that works the best.
From instagram.com/thecancerpatient/
Another battle that you have to deal with in between your follow-up tests is your mind constantly questioning whether or not any new thing that’s happening in your body is a result of the cancer returning. It doesn’t help that a lot of the side effects from cancer treatment, like changes in your bowel habits and fatigue, are signs that colorectal cancer is returning. Your bowels do a lot of changing and adjusting after treatment so with each change you wonder whether it is a result of the chemotherapy or your ileostomy reversal surgery or if it’s the cancer returning.
These things are exactly why you shouldn’t assume that things will just go back to normal and your mental health will be perfectly fine. You’ve been through a traumatic event and it takes time to heal from trauma. It doesn’t mean that you’re weak at all. Your body has betrayed you so feelings of anger, sadness, and resentment are totally normal. If you’re one of the lucky ones that survived a diagnosis and treatment, happiness and gratefulness are totally normal, but survivor’s guilt also is if you’ve made friends along the way and they haven’t been as fortunate as you.
So what can you expect post-cancer treatment? Well, the follow-up schedule is one concrete thing that you can count on. Beyond that, the physical and mental side effects can ebb and flow for years. Try to do your best to make your health a priority so that you can make it through life post-treatment. My next live stream will be on Thursday, October 15th at 7 pm Mountain Time. So if one of those things that’s helping you out is watching my videos to help you feel less alone through your cancer diagnosis make sure that you’ve clicked the subscribe button and hit the bell so that you’ll receive the notifications when I’m going live and when my future videos are posted. Go on and click the like button down there too if you enjoyed this video. Thanks for watching.
*This video was originally published on October 9, 2020
Welcome back to Life as a Cancer Survivor. In this video, I’ll talk about the basics of the IV chemotherapy FOLFOX, which is commonly given for Stage 3 Rectal Cancer patients. I’ll talk about what the drugs are that are in it, how they’re administered, and the side effects that I experienced. In another video, I’ll dive even deeper into those side effects and also give you hints on how I coped with a lot of those side effects. My name is Jelena and I was diagnosed with Stage 3 Rectal Cancer in May of 2016.
So a week and a half before I was scheduled to begin chemotherapy I had another chemo training class which was just an appointment with my Oncologist’s Physician Assistant. So at that appointment, I got this folder of information which included my current medication list, a packet of information on FOLFOX, and a separate handout just on oxaliplatin and neuropathy. So the first of those sheets that I’ll go over is my current medication list.
The only thing that I was taking at the time was vitamin D for a deficiency that I had before I was diagnosed with cancer. But in addition to that, they added three more medications to that list. The first one was Zofran, an anti-nausea medication, and that one I was supposed to take just a few hours after I got home from my chemotherapy infusions that evening to help keep the nausea at bay and under control. And I was supposed to take that for 2 to 3 days following the infusion. The second prescription was for Compazine and that one is also an anti-nausea medication and that one I was supposed to use for breakthrough nausea so if in between the doses of Zofran it wasn’t enough I was supposed to take Compazine as an additional tool in my box to try and keep the nausea under control. Then the third prescription was for lidocaine which is a numbing cream. I spoke about this one in my port video, I was supposed to put the cream over the port site before a needle was inserted into it for blood draws or for chemotherapy so that it was numb and I wouldn’t feel it at all.
The next packet of information I received was all about FOLFOX, the IV chemotherapy I was going to be receiving. FOLFOX is actually 3 different drugs mixed together. It is 5-fluorouracil, also known as 5-FU, oxaliplatin, and leucovorin. The 5-FU and oxaliplatin are chemotherapy drugs that prevent the division and growth of cancer cells and causes them to shrink and die. The leucovorin helps increase the efficiency or the efficacy of the 5-FU. When I would go in for chemotherapy infusions, all three drugs would be given to me over the span of about 3 hours plus anti-nausea medications at the very beginning. The way it was divided up, at the very beginning for the first 15 to 20 minutes would just be an infusion of anti-nausea meds, then for the next two to two and a half hours it was the chemotherapy drugs, then they would disconnect me from that and they would connect a portable pump to me through the port and I would take that pump home and over the next two days I would continue to receive an infusion of 5-FU. Then after those 2 days I would return to the cancer center and they would disconnect me from the pump. That’s what I had to look forward to every two weeks for 8 cycles.
On the consent form that I had to sign, let me show you it has a long list of just general chemotherapy side-effects that no matter what chemo you’re on you could experience. And those are just for general chemo. In addition to that, there’s also information in the FOLFOX packet it had even more side effects that were specific to FOLFOX. Now here’s the highlighted list of all of the side effects from that consent form that I experienced: diarrhea, fatigue, hair loss. I didn’t lose all of my hair but it thinned quite a bit, loss of appetite, low platelet count, low white count, menstrual irregularities, nausea, numbness and tingling in extremities, and weight loss. From the FOLFOX packet, it listed even more side effects and it separated them out based on whether they were common which means 25% or more of patients experienced it, down two rare which means less than 5% experienced it. From that list, I experienced: throat pain, difficulty swallowing or eating, muscle cramps, metallic or medicinal taste, and trouble sleeping.
Then I also got these two handouts on oxaliplatin and neuropathy. The oxaliplatin cancause nerve damage in the extremities, so your hands and your feet, and that nerve damage is what can cause neuropathy. In case you’re unfamiliar with what neuropathy is, it’s defined as a tingling, weakness, burning, and pain in the hands and the feet. A common cause is diabetes, but many chemotherapies including oxaliplatin can cause neuropathy as well. It can start as soon as during your chemotherapy infusion, but typically it will go away after a few days. I got tingling in both my hands and in my feet but the hands they would get better within a few hours after the infusion. The feet however, that tingling turned into some burning and pain which lasted two years after I finished my last infusion. The neuropathy is definitely something that you want to keep your doctor posted on. Think of it kind of like radiation burns. The worse they get, the harder it is to recover from, and they don’t go away after you finish treatment. Other weird neuropathy side effects that you can experience with the oxaliplatin is just a general extreme cold sensitivity. As you can see in this picture, I had a water bottle with me at my very firstinfusion and I always brought one with me because I would be there for a few hours. Within about a half-hour of starting the chemo part of the infusion the first side effect kicked in. When I took a sip from my water bottle when I swallowed it felt like I was swallowing glass. It startled me because I wasn’t quite sure what to expect with that cold sensitivity. From that point, until about 5 days after my infusion, it was no cool and not even room temperature drinks, it all had to be warm otherwise it feel like the glass going through my throat when I would swallow.
The handouts also gave multiple other tips or hints on how to deal with the cold sensitivity. So it notes in there make sure that everything that you eat or drink is at room temperature or warm, if you feel cold put on a sweater or get under a blanket, duh, I think that’s obvious for anybody that’s not even on chemotherapy. Cover up when you’re outdoors, always wear a scarf over your nose and your mouth, avoid direct exposure to air conditioning, which, um, I could avoid air conditioning but the extreme cold was hard to avoid because I was getting treatment in winter in Colorado, don’t use an ice pack on any part of your body, keep a pair of gloves in the kitchen for handling things in the refrigerator, and then also keep socks or slippers nearby all the time for walking on tile and linoleum, wood floors also.
There’s also a thing that many people call “first bite syndrome,” which you’ll most likely experience after each infusion. It always happened to me and it was always the first bite that I took of something after I left the cancer center. It was like a really stiffness and pain in the jaw but it only happened for that very first bite. It made a kind of difficult to chew the first bite but then after you swallowed it and took another bite everything was fine so it was really strange and weird but that’s something to also watch out for.
For me, the oxaliplatin is what caused the worst of the side effects. How do I know this? Well, for my final treatment number eight they left the oxaliplatin out completely because the tingling in my feet was getting worse so instead of damaging the nerves even more they left it out. After that infusion I didn’t have any of the extreme cold sensitivity side effects like I had had after other infusions.
The schedule of appointments went like this around each infusion. A day or two before I would go in to get my blood drawn. I would go down to the cancer center for this because I wanted the nurses down there to access my port for it because I could numb the port and I wouldn’t feel it, but also within a half-hour to an hour after the blood draw appointment (because they do it by appointment at the cancer center) I would have an appointment with my Oncologist’s Physician Assistant to go over those results. So it was just easier to have it all done right there and at that appointment with the PA she would go over the blood test results, basically just summarizing the things that they were looking at to make sure that my body was healthy enough to receive chemo the next day. So the platelets were the one thing that dropped a lot for me, so that was the one thing they would keep an eye on. The platelets are what’s in your blood that cause it to clot, so when your platelets get really low even a small cut could turn into an emergency because the blood won’t clot and it won’t stop bleeding.
Then the following day I would come back for chemo. I went back and got to choosewhatever chair I wanted in there so I would always go over into the corner by the window so that I could look out at the mountains. I got settled in for 3 hours or so and then got the pump attached to me to take home. Here’s a picture of what it looked like and it came with its own set of instructions just in case you needed to know how to work it. All I needed to know how to do was how to shut it off when it started beeping when the chemo was done. Then I was also sent home with this Hazmat kit. It was very comforting to know that what they were injecting into me needed cleaned up with a Hazmat kit. Then they also gave me both an over-the-shoulder bag or a fanny pack that I could choose from to where the pump in. I chose the over-the-shoulder bag because the fanny pack was way too big around my waist and it was a fanny pack. So I wore that pump for 2 days. My chemotherapy was always on Tuesdays so I would go in at the end of the day on Thursdays, I would have to go back to the cancer center to get the pump disconnected from me. This was my schedule every other week for 8 cycles.
I hope you learned a little bit more about what FOLFOX is and the basics of IV chemotherapy. I’m going to do a future video on more specifics of the side effects that I experienced and how I coped with them so make sure that you’re subscribed so you don’t miss that video. In my previous video, I talked about what it was like to get a port placed, so if you missed that one you can click here and that’ll take your right over to that video. Make sure that you click on the like button though if you enjoyed this video and please share it with anybody that you think also might enjoy it. Thank you guys so much for all your support and thanks for watching.
*This video was originally published on May 22, 2020
The Major Types of Rectal Cancer Surgeries | For Stage 1 – Early Stage 4 Patients
Hello! Last week I mentioned that this week’s video would be about my surgery, but I thought before I get into the details of the slicing and dicing of my surgery for rectal cancer that I should maybe describe what the surgery actually was a little bit more. Then you’ll have a better idea of what the surgery entails before I start going into the details of what it was like to be a patient going through this surgery. If you don’t remember me mentioning that, well you must be new here. Welcome to Life as a Cancer Survivor. I created this channel to help those that have been diagnosed with Colorectal Cancer better understand what they might expect as they’re going through treatment and even after treatment, plus, to help promote awareness of this crappy disease. My name is Jelena, and in May of 2016, I was diagnosed with Stage 3 Rectal Cancer. If you are new here, please make sure you’ve hit the subscribe button over here, or in the description below there’s also the link to subscribe so then you’ll never miss a new video. And now, on to all of the different surgeries for rectal cancer.
Early Stage Rectal Cancer Surgery
If the cancer is found at an early stage there are 2 options for surgery, neither of which require any incisions The first one is a polypectomy. This one is done during your routine colonoscopy. If the doctor finds a polyp during your preventative colonoscopy they will just take it out right then and you don’t have to go back for a separate surgery. However in the United States, as soon as that polyp is removed during the procedure it changes from just a preventative screening to a surgery, which means you could end up with a surprise bill in addition to the surprise that cancer was found in your colon. This can be especially hard on patients that are on Medicare that are already on a fixed income.
This is why advocates like myself have been working with the organization Fight Colorectal Cancer to close this federal loophole so that the procedure is covered 100%, even if a polyp is removed. The bill passed the House on December 12, 2019 and is now waiting for the Senate to pass it. It has a bi-partisan group of over 330 co-sponsors in the House, which means that the bill is “veto-proof” once it passes the Senate because there’s enough support to override a presidential veto. The bill currently has 60 Senators as co-sponsors, so we have the support, we just need that final push to bring it to a vote. If you would like to help get this passed, please contact your Senators and urge them to pass this. Here is the link that will take you directly to Fight Colorectal Cancer’s page and it has a short form, for you to fill out, and it even has a prewritten message to send directly to your Senators. They even take the legwork out of finding the contact information ’cause as soon as you fill in your address they will know who your two Senators are to send this message to. If you do send a message let me know in the comments below, we need all of the help that we can get.
Now to learn about the second type of surgery that can be done to remove early-stage rectal cancers, which, this one can also be done during a colonoscopy but some of the tissue from the rectal wall is removed also because the polyp has grown a little bit into the tissue. Just like the polypectomy, as soon as the local excision happens during your colonoscopy it changes the procedure from a preventative screening to a surgery, so you’re billed for a surgery. Both the polypectomy and local incision are done as outpatient procedures and require no hospital stay as long as everything goes according to plan.
Rectal Cancer Surgeries for later-stage patients
If the tumor is too large or it has grown too deep into the rectum wall, then there are 2 different options that are available depending on the location of the tumor. My tumor ended up being high enough in the rectum that I received a Lower Anterior Resection. Let me show you a picture of the colon and rectum again so that you’ve got a better idea of what I’m talking about here. In a Lower Anterior Resection, they cut out the part of the rectum that the cancer was in, and in my case, they also removed some of my colon. They then reconnect the remaining colon and rectum, which is called a resection. This surgery typically takes around 4 hours. This is done through either an open surgery or a minimally invasive surgery, also known as laparoscopically. In an open surgery, they cut a long incision down your abdomen to open you up for surgery.
For laparoscopic surgery, several small incisions are made in the abdomen and they call those incisions, ports. So through those incisions, these tube-like shaped things called
trocars are inserted into those incisions. Through the trocars, a small camera and specialized instruments are inserted into the abdomen, and your abdomen is inflated with carbon dioxide so that the surgeon has a better view and has more room to maneuver during the surgery. Even if your surgery is done laparoscopically you still may need an incision down your abdomen to remove those parts of the colon and rectum that have been cut out. The incisions are then closed with sutures or staples.
To allow the resected site a chance to heal before stool starts passing through there again, many patients also receive a temporary ileostomy. The length of time that you keep that temporary ileostomy is really up to your surgeon. Some like to reverse it after just a couple of weeks, others like mine wanted to wait until I was finished with my IV chemo before reversing it, which means that I had mine for around 7 months. Others that are on chemo for life may choose to keep their temporary ileostomy forever because taking a break from chemo means they’re taking a chance that their cancer is going to grow and/or spread.
The other type of surgery is called an Abdominal Perineal Resection, or APR. This surgery is done for patients where the tumor is so low in their rectum that the sphincter muscles can’t be preserved. In this surgery, the lower part of your colon, all of your rectum, and your anus are all removed. This is surgery can also be done either via an open surgery or laparoscopically. Even if the surgery is done laparoscopically, they still make an incision in your perineal area which is the area from your anus over to your genitals. And that’s the site where they remove the colon, rectum, and anus. Because your anus has been removed, that hole plus the perineal incision site are all closed up, giving you what many patients call a “Barbie butt.”
Patients that undergo an APR end up with a permanent colostomy because all of those end parts that you need to be able to poop normally have been removed. If you need a reminder on what a colostomy or an ileostomy are, I’ve got a video that describes what the different ostomies are. Just click on the link up here and that’ll take you over to refresh your memory on those.
Because the LAR and APR surgeries are much more involved surgeries, they typically require a 4-7 day hospital stay if there are no major complications. And that’s your summary on the different surgeries for Stage 1 through early Stage 4 Rectal Cancers. Next week I will be talking about my experience and the caretaker perspective on the day before and day of surgery. If you happen to have missed my treatment plan video, that’s right over here, you can click on that and it’ll take you right to it. Thanks so much for watching.
*This video was originally published on February 12, 2020
Gift Ideas For Someone Going Through Radiation Therapy
Today I’m going to be sharing with you some great gift ideas for giving to somebody that’s going through radiation therapy. If you’re new here to this channel welcome to Life as a Cancer Survivor. My name is Jelena and I was diagnosed with Stage 3 Rectal Cancer in May of 2016. Radiation and oral chemotherapy were the first steps in my treatment, and I’ve talked about going through each of those in my last two videos. If you happen to have missed those, I’ll have the link above here to the playlist where you can find both of those videos. I’ll talk in future videos about great gift ideas both for someone that’s going into surgery and is gonna have a hospital stay and also for somebody that’s going through an ileostomy reversal so make sure you’re subscribed to my channel so you’ll get notifications when those videos are live. And now for the fun stuff, the gifts!
The first really helpful gifts that I got were shorts and tank tops. Theshorts were especially great because I could easily pull them down to my knees for treatment and then quickly get them back up when it was done. They weren’t super tight-fitting as you can see so they easily slid up and down and they weren’t even tight like in the butt or anything so when you start getting burned they’re not aggravated by tight pants. And were quickly and easily removed when that radiation diarrhea starts setting in. I went through treatment in the summer so the tank tops are nice and flowy and comfortable and they’re perfect for going from radiation treatment straight to bed for those midday naps. For cooler weather, pants like these are similar to the shorts in that the waistband, nice and comfy, not too tight, and they easily transition from radiation to nap.
For the rest of the gift ideas, and actually, for those pants, I’ve got links to all of them in the description below so check that out. I think I’m also supposed to tell you that those links lead you to my Amazon affiliate account so if you click on those and you happen to buy anything I will get a small commission off of the purchase price of those items. I’ll let you know in the description below if it’s a product that I used and highly recommended, a friend used and highly recommended, or I just got the recommendation of an item and so I chose one based on what they recommended. Now back to what you’re really here for, the gift ideas!
I got a care package about halfway through my treatment from a group of high school friends and in that I got this cute little USB Drive loaded with music. The music was separated into five different playlists: rest, rollick, rumble, remember, and relax. It was a good combination of music to pump me up on my rides to and from radiation every day and also to help me calm and relax and just stop thinking about cancer for a little bit. And since it was music picked out by my friends it was a lot of stuff that I really liked but didn’t have so it mixed up my playlists.
There was also this hilarious book that I should have read on those days when I was too tired or hurt too much to get up and do anything but I mistakenly waited and took it with me while I was there for surgery for my hospital stay and I’ll tell you why it was not a good idea just for this kind of book for surgery time, at least for me in that video about gift ideas for surgery.
There were also animal crackers in there which were nice easy to grab snacks that were also really gentle on the tummy when it was in turmoil from radiation. Then last but certainly not least was a gift card that was good to use at multiple restaurants around town. That was really handy once the hand and foot syndrome started kicking in and it’s painful just stand on your feet let alone try to cook. Plus your caregiver is getting exhausted by then as well.
To help soothe the area that’s being radiated before burns really start setting in, fellow survivor friends recommended either Aquaphor or calendula cream. One friend suggested unscented lotion, another scented lotion, either one lotion is an excellent gift idea. When someone goes through radiation treatments their white blood cell counts drop which means you’re more susceptible to getting sick and if you do get sick it’s much worse than if a normal healthy person gets ill. That means lots of handwashing which dries your hands out really bad, so that lotion is very helpful to help soothe those dry hands. And if the person is taking the oral chemotherapy Xeloda, that means they’re more susceptible to getting Hand-Foot Syndrome, so lathering your hands and the bottoms of your feet and lotion can help delay the onset of Hand-Foot Syndrome.
Next up is a bidet. There are cheap versions that are just a nozzle or a sprayer that you attach to your toilet. Those are about twenty or thirty dollars. Or if you’re a really generous friend, you can give them a bidet that’s got a heated seat and even a butt dryer for $300+. This is not just a short-term gift either. If they’re going through pelvic radiation they’re gonna get burns. Any rubbing is gonna irritate them and the water from the bidet feels much better on the tush. If they’re going to have a temporary ileostomy that bidet will be a lifesaver after they go through their reversal surgery and I’ll talk about that in a future video.
Another great gift is maid service. As radiation treatment wears on the fatigue starts to set in more and more and cleaning the house is kind of put on the back burner. Having a maid service gives that person a nice clean house to look at while they’re just laying around the couch because they’re too tired or hurt too much to get up and do anything. Plus their immune system is gonna be taking a hit during treatment so at a minimum having a clean bathroom is really gonna be helpful for them.
Gift certificates for a manicure or a pedicure are great too. It’s a greatway to get pampered for a little bit and the results can be seen for days maybe even weeks after. Even when you haven’t showered in days and you feel like a disaster, having some nicely polished nails can help be a little bright spot in someone’s day. Or if nails aren’t really their thing other fellow survivors also suggested scalp massage or reflexology session. The reflexology was recommended by a fellow survivor to help with calming your nerves and anxiety which you’re gonna have some if you have cancer.
I got many other great suggestions from fellow survivors too. Comfort items like fuzzy socks which I got these fuzzy socks for surgery or a blanket. Things to do when they’re too tired or hurt too much to get up and do anything like puzzles or good books. And to help with that radiation-induced diarrhea a box of Imodium. Just a card tora let them know that you’re thinking of them too is always appreciated.
Of course, each person is different but these are some of the top gifts that any person going through radiation would love to receive. I hope that this list has helped you figure out a great gift to give. Next week’s video is gonna be a true cancer vlog where I take you along with me on the adventures of getting a CT scan because it’s that time of year so I want to bring you along with me for it. If you need to catch up on any of my earlier videos the playlist for the beginning of my cancer journey is right up here. My face is down here for you to click on and subscribe. So, I want to thank you guys for watching and I’ll see you next week.
As an Amazon Associate I earn from qualifying purchases. Don’t worry, it’s at NO COST to you.
👍Calendula cream was highly recommended by a fellow survivor, this one is highly rated: https://amzn.to/2SOKKIh 🚽Budget version of a bidet that is highly rated & a best seller: https://amzn.to/34Tc7q9 🚽Fancy bidet that I’ve used at a doctor’s office and was FANTASTIC: https://amzn.to/3jXyn8F
💙Cozy blanket I have and highly recommend: https://amzn.to/377fpsv 💊Last but not least, Imodium! I’ve used the brand name stuff here: https://amzn.to/2SOzxr8, but usually buy a generic brand at the grocery store.
*This video was originally published on December 11, 2019
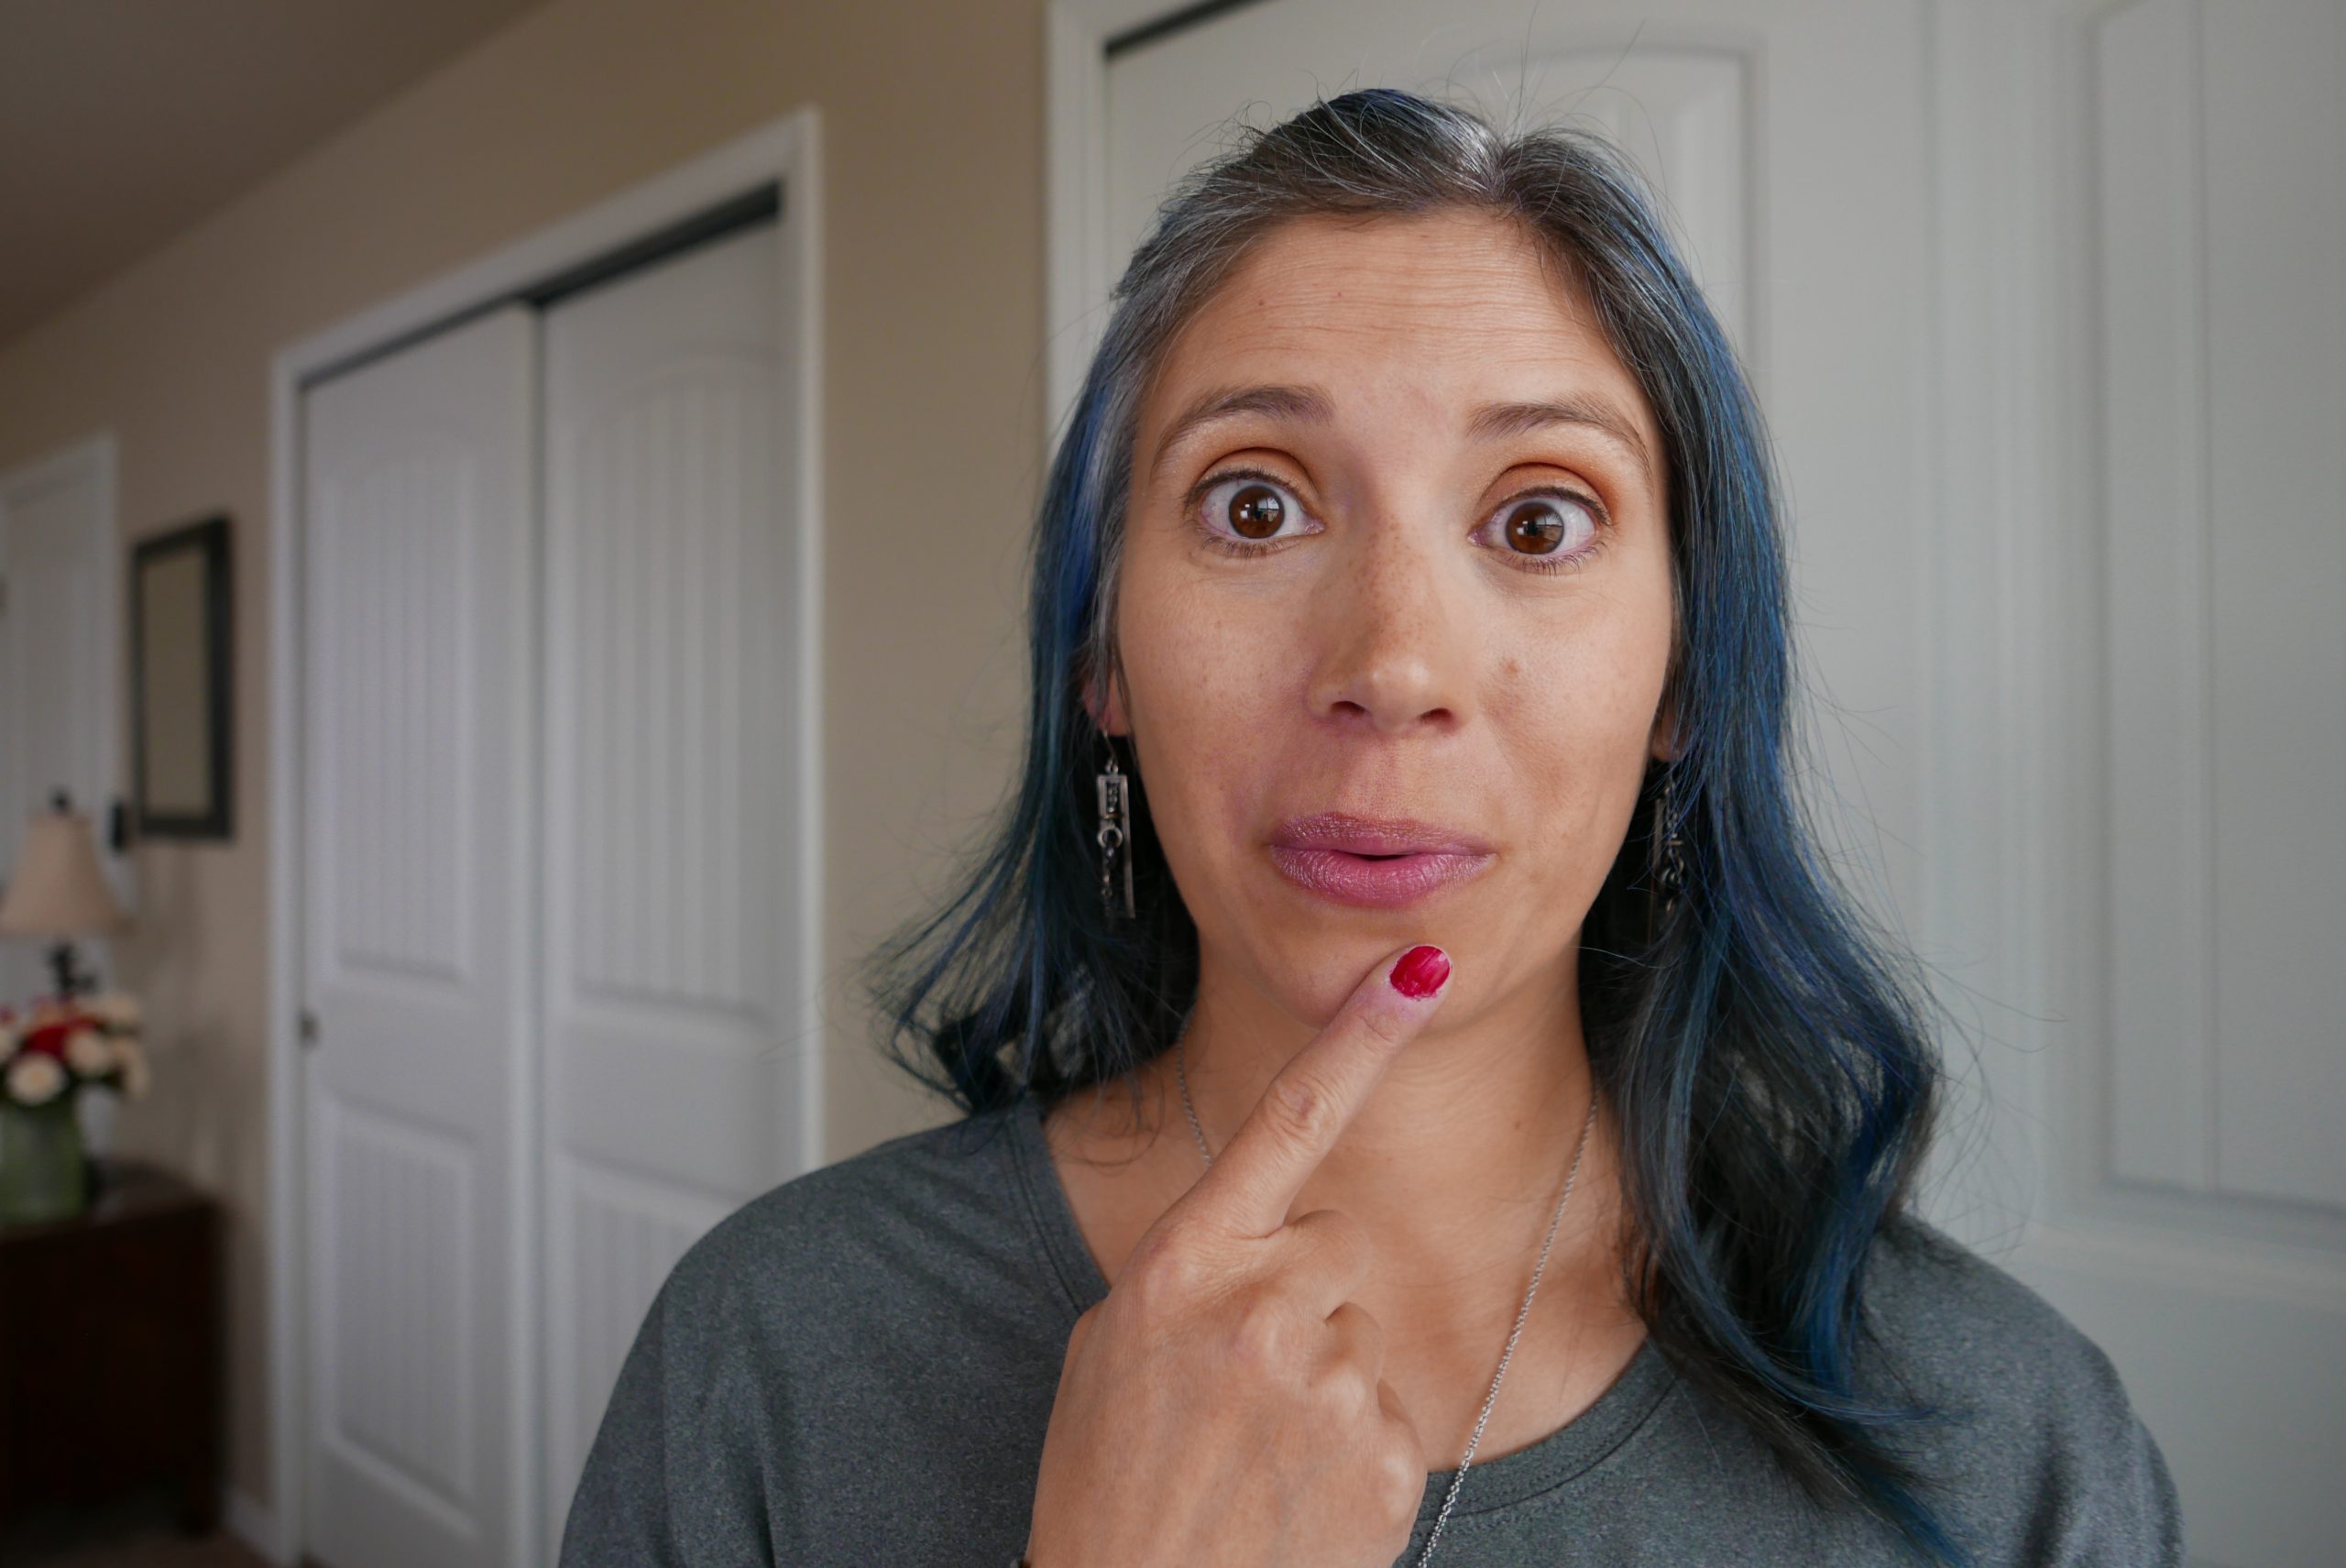


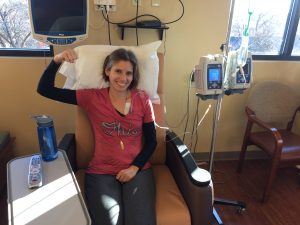

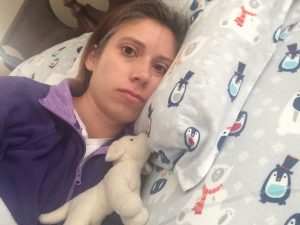

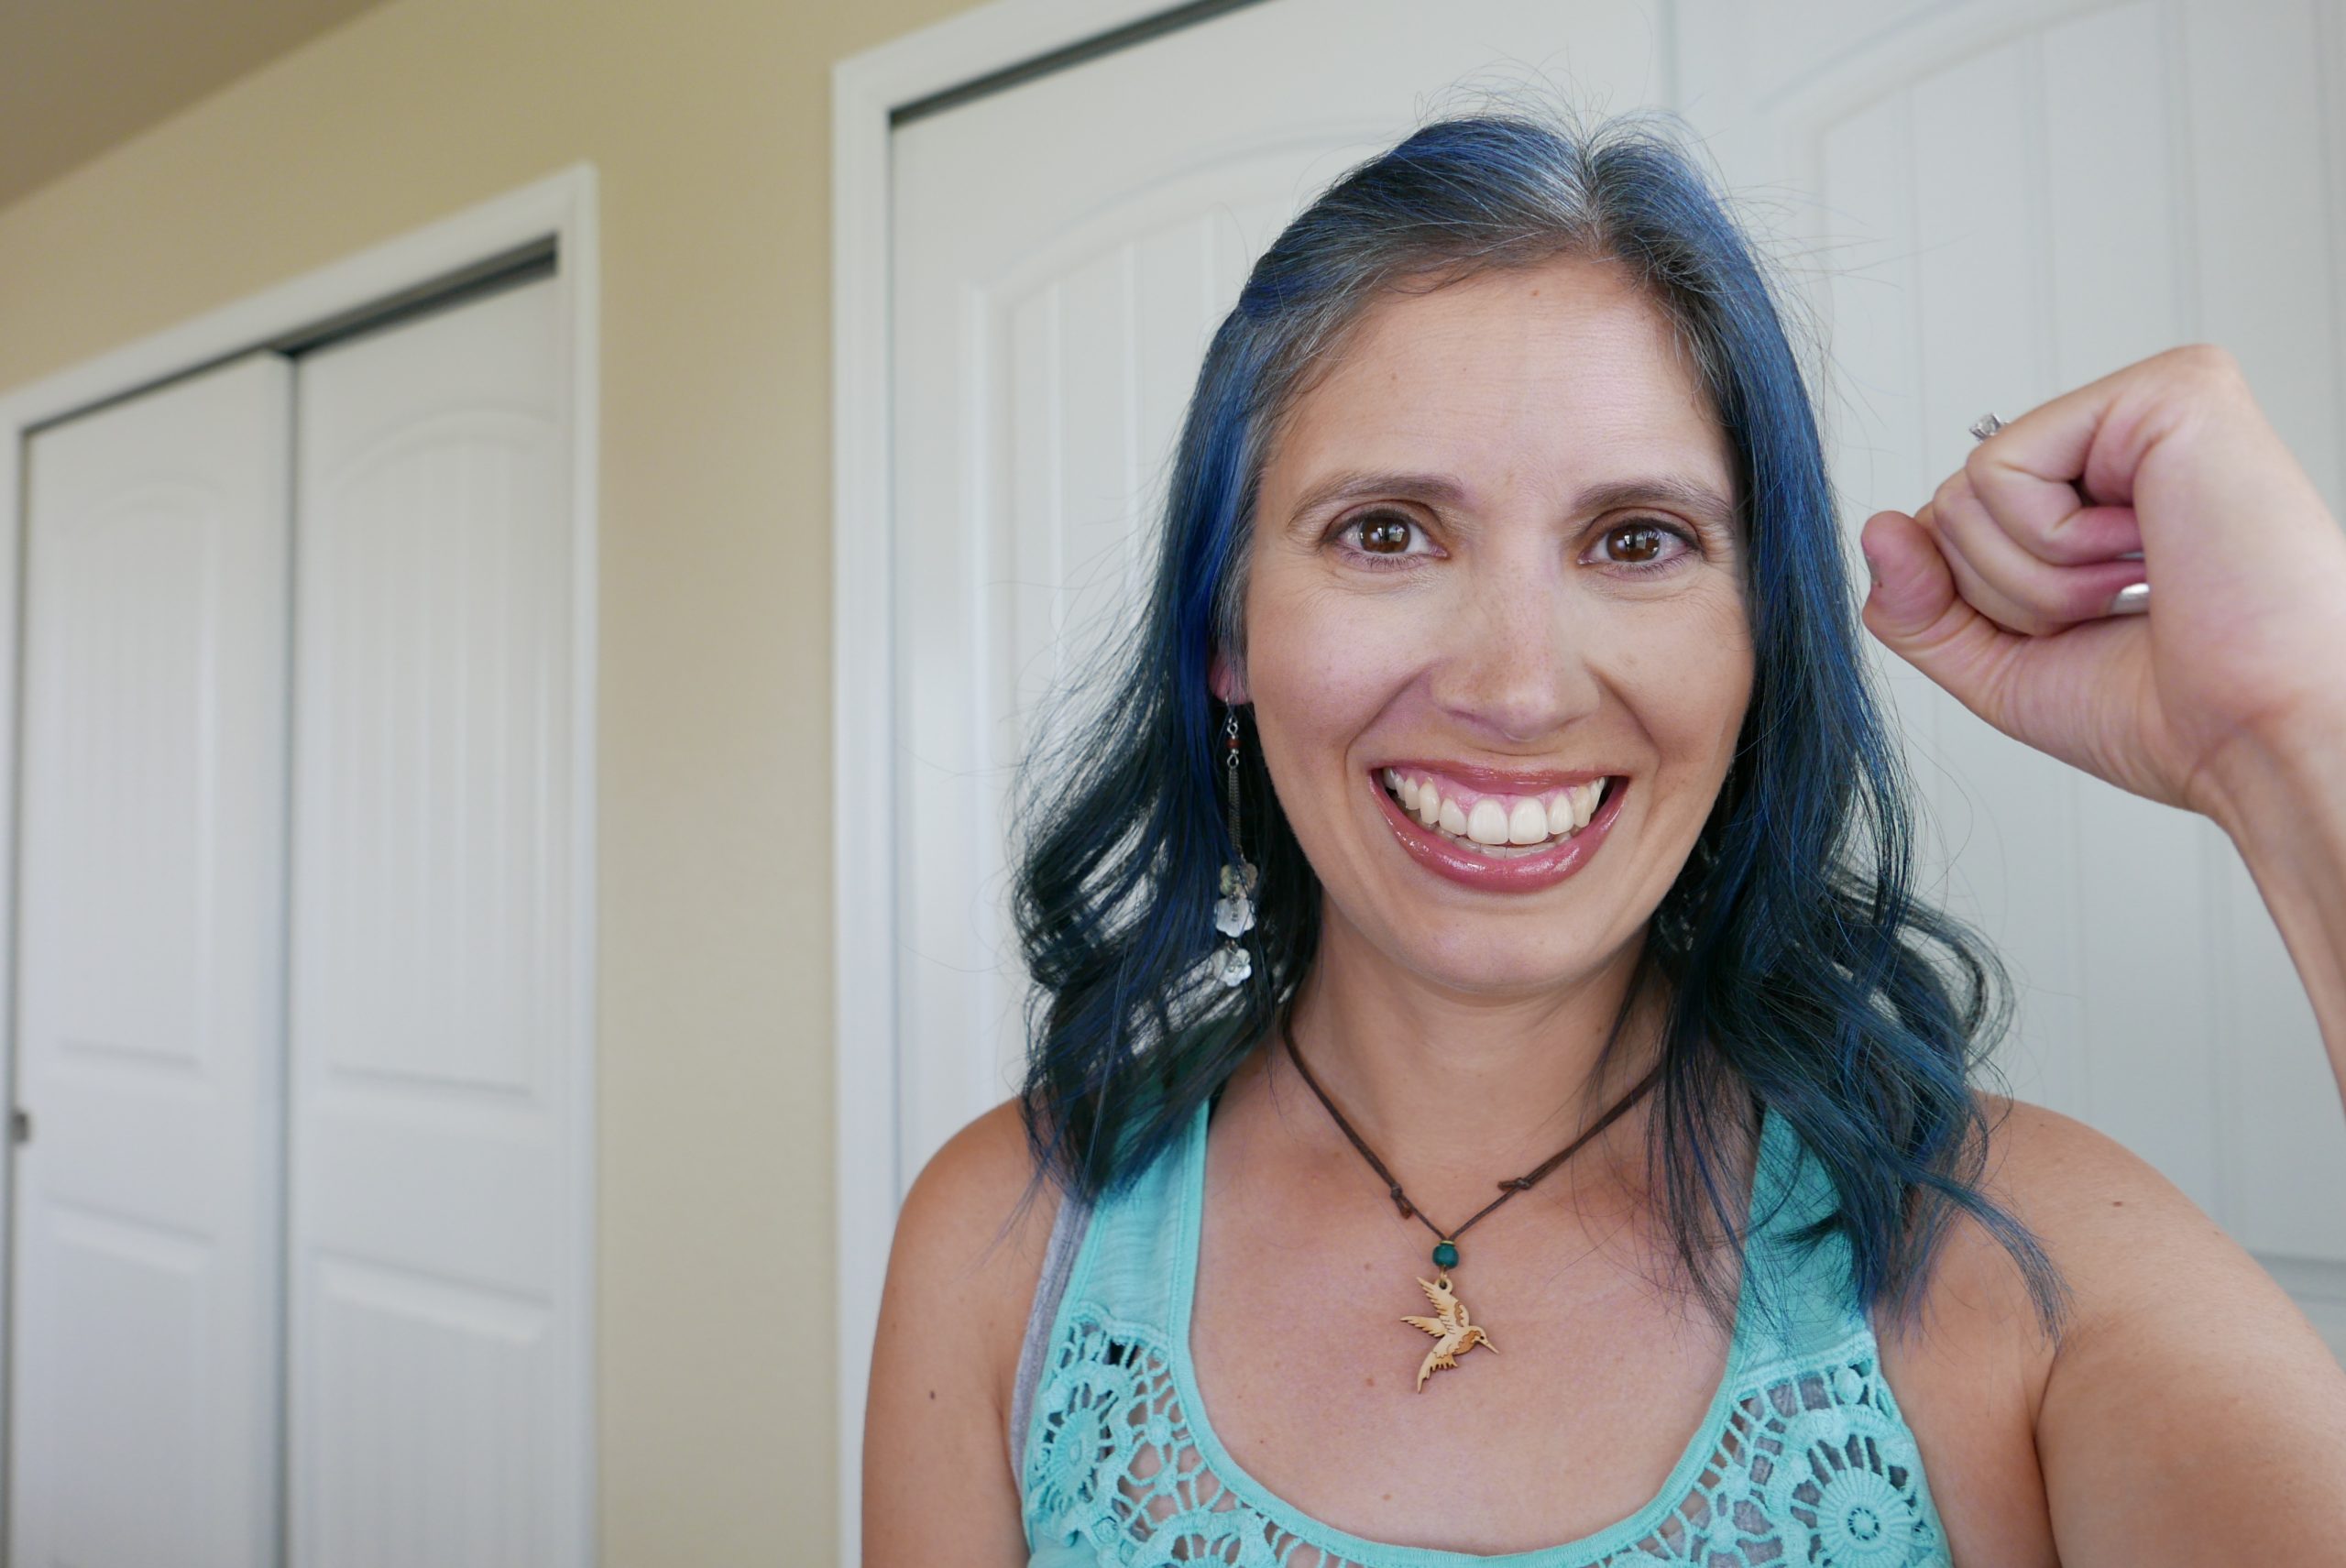


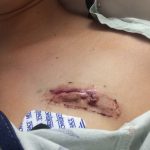 tolerable than with my LAR surgery. It was only like a two or three on the pain scale. Maybe because they just had to sew the hole in my small intestine up and basically just shove it back inside of me, and then take my port out. The hole where they put the stoma back into me, they didn’t even sew that shut they just packed it with gauze and then loosely covered it with a bandage. the port scar is pretty gnarly looking as you can see from this picture I thought it looked like I had lips on my chest and, even to this day, the scar is still pretty big and noticeable. Let me show you. Here’s what it looks like.


 was putting diaper rash cream on after every visit to the bathroom. I felt like I basically lived on the toilet on Sunday with a total of 17 visits, and almost all of them were urgent but it did let up for Sunday night so that I could get some sleep. Sunday was also the first day that I saw my first fives on the Bristol scale, so we had moved from a six to a five so there was a little bit of good news there. Monday I had 12 bowel movements that were pretty much looking like peas and marbles, and my butt was so raw the diaper rash cream wasn’t


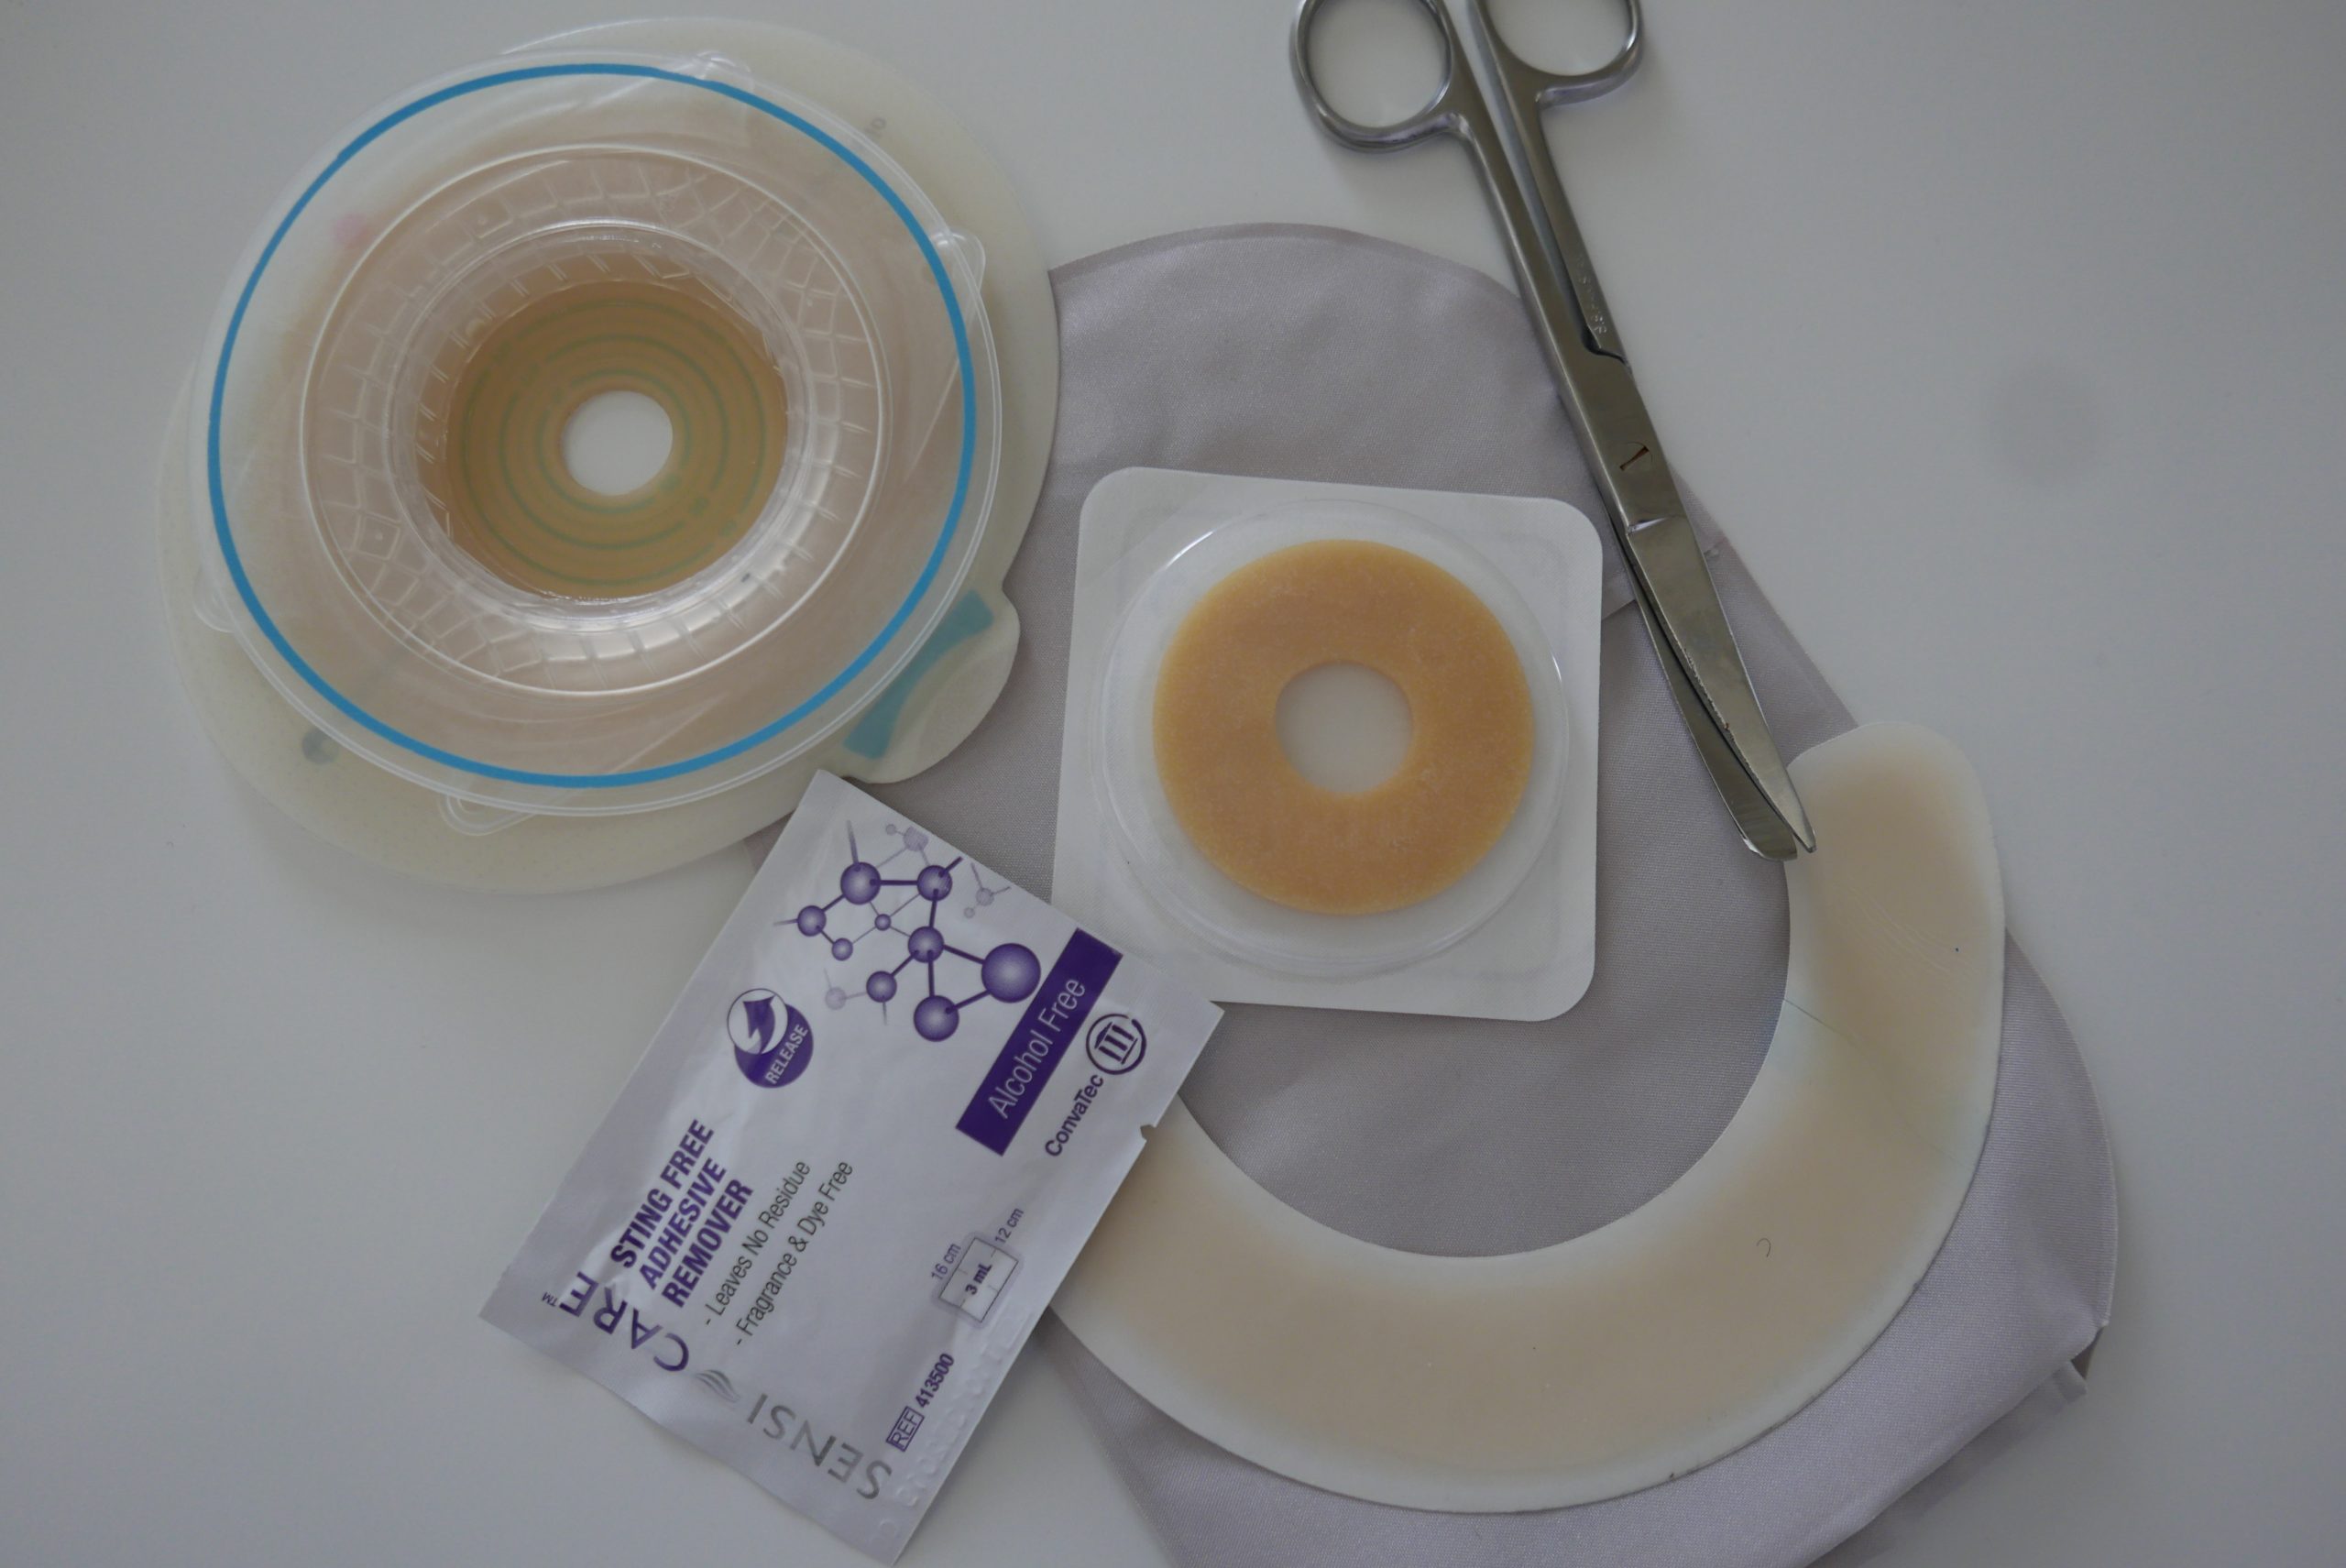
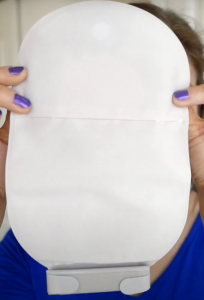


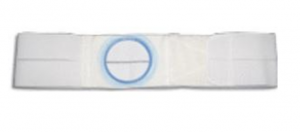


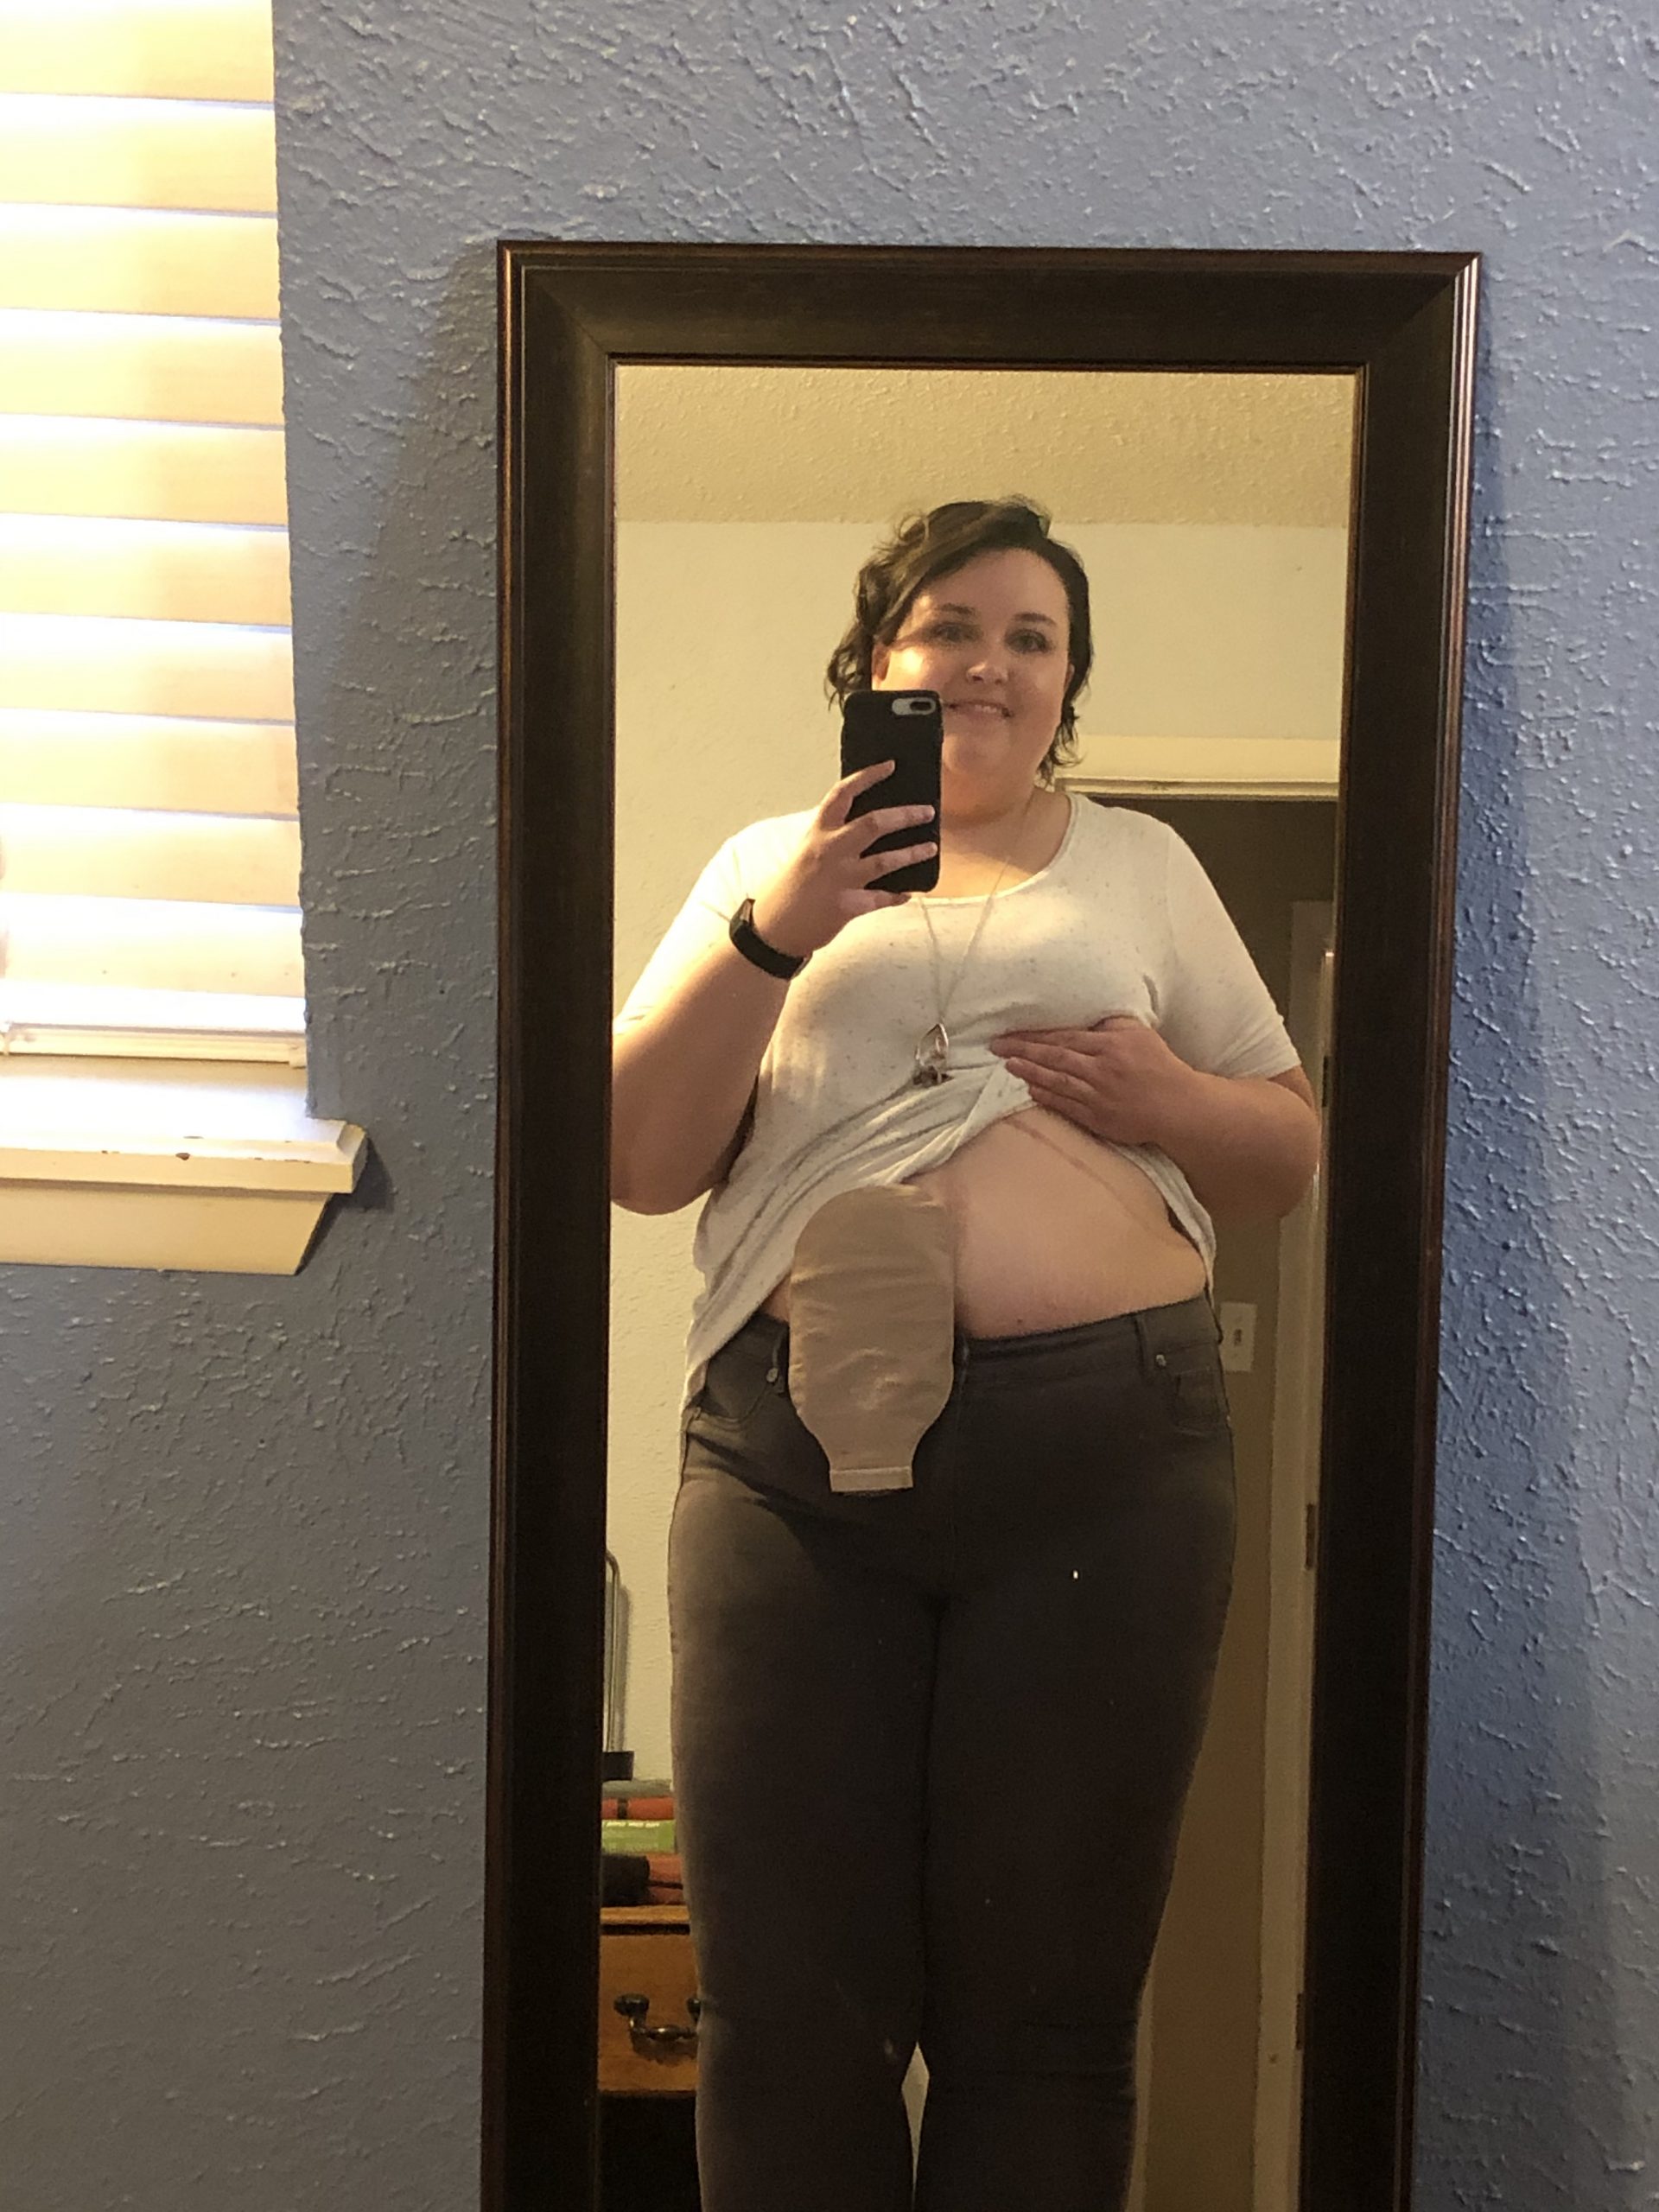
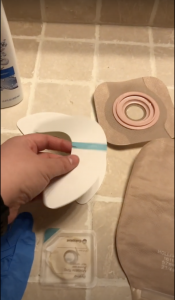
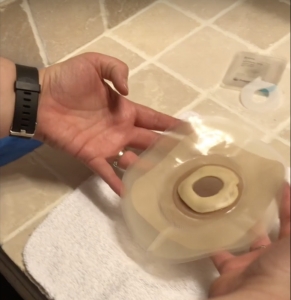
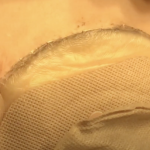

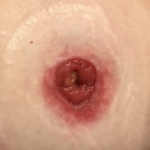


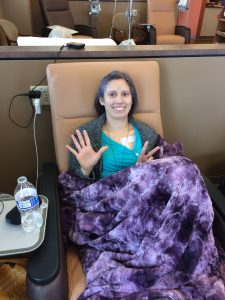


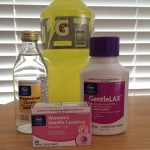


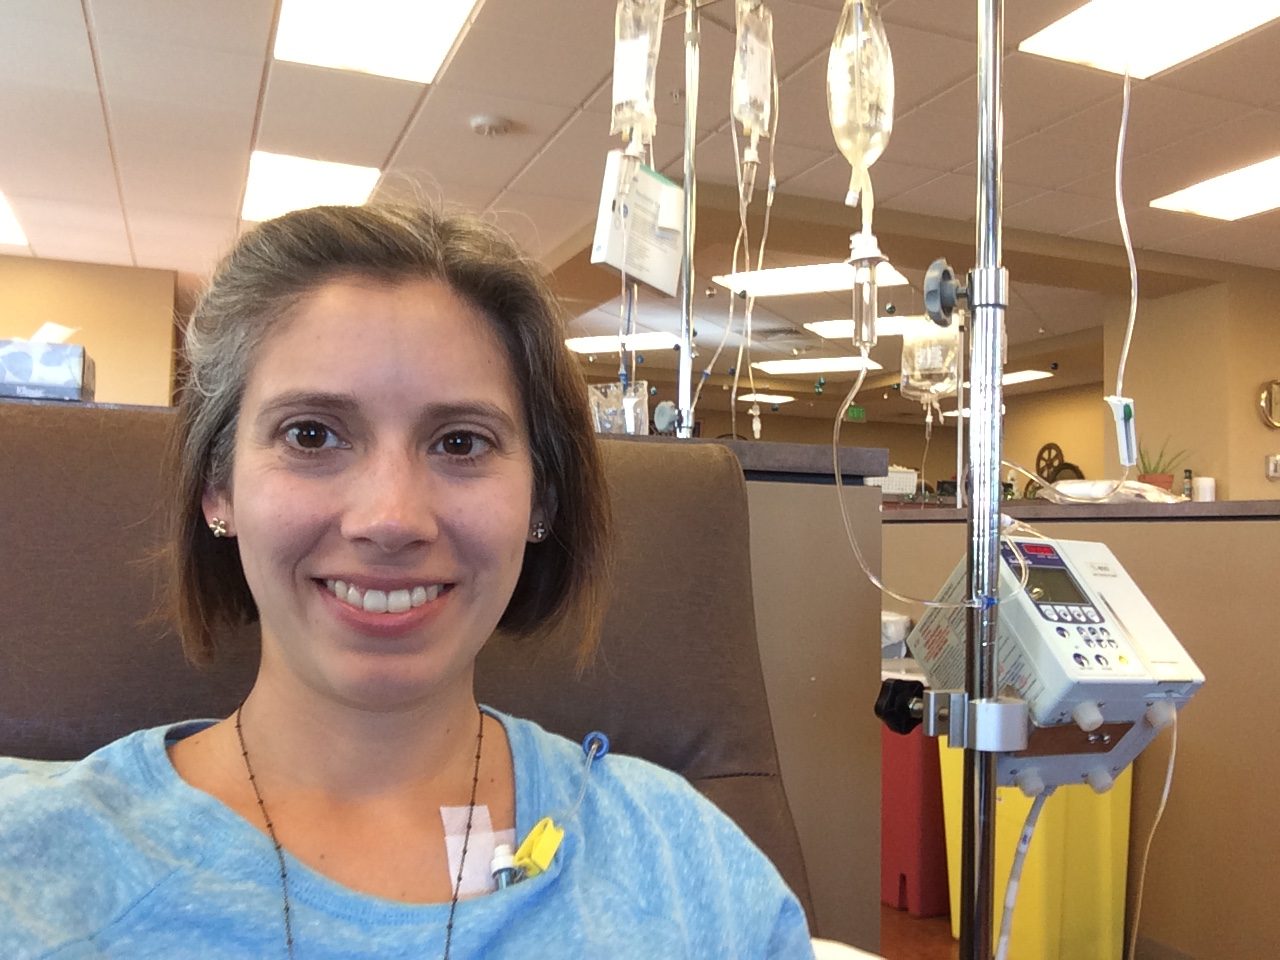
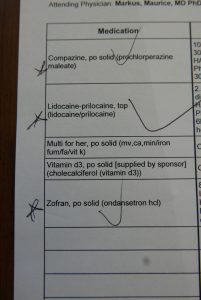
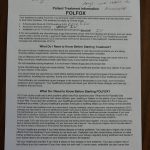
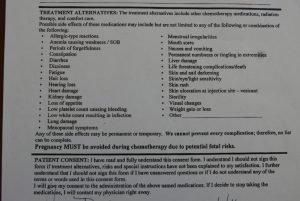
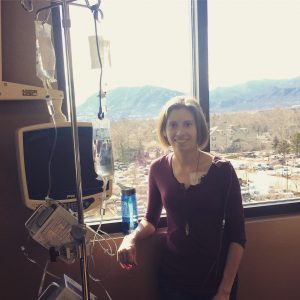

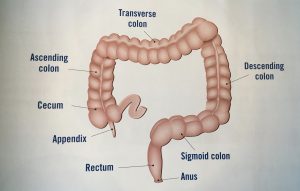


 friends and in that I got this cute little
